Note:
1. For Mac users, please duplicate and install UnicTool iFindit in your Applications folder instead of double clicking the software after saving it on your Mac.
2. If you want to recover one or more specific data type(s), it's recommended to choose the corresponding data type(s) instead of selecting ‘all’ before the scan, because it will take much more time to scan a larger amount of data.
Part 1. Smart Recovery
1Choose a Smart Recovery Mode
Download and launch UnicTool iFindit on your Windows or Mac computer, choose Smart Recovery mode.
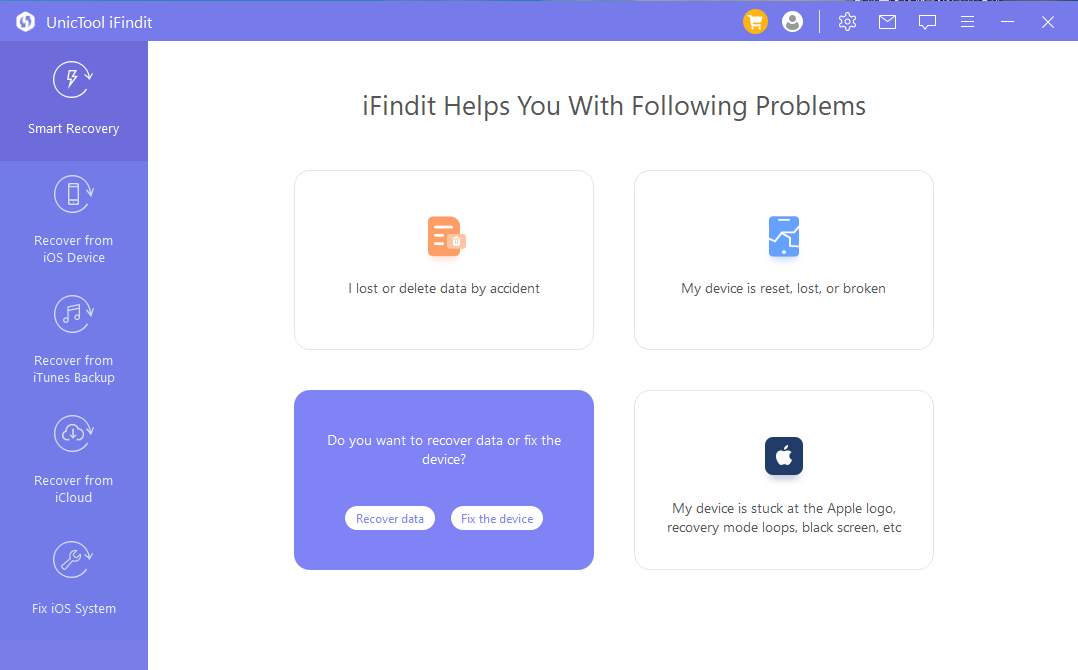
2Choose the Problem You Met
Choose the problem you want solved from the given list. The program will automatically lead you to the "Recover from iOS Device", "Recover from iTunes Backup", "Recover from iCloud", and "Fix iOS System" modules.
Part 2. Recover from iOS Device
1Connect Your Device to Computer and Proceed to Scan
Launch iFindit on your computer, choose "Recover from iOS Device" mode. connect your device to computer with a lightning cable.
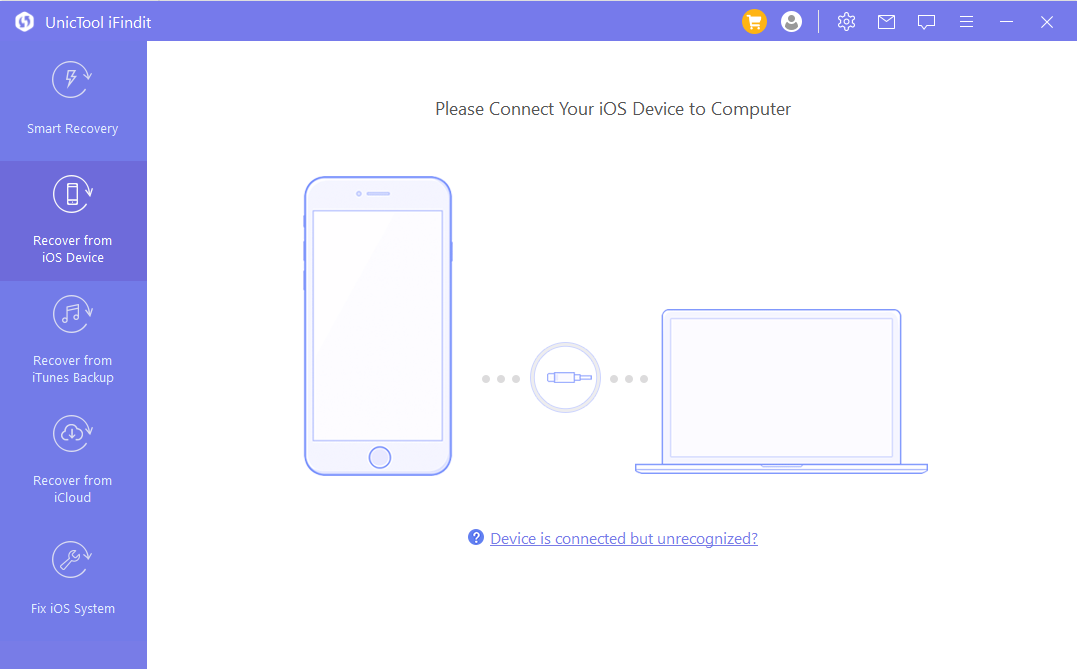
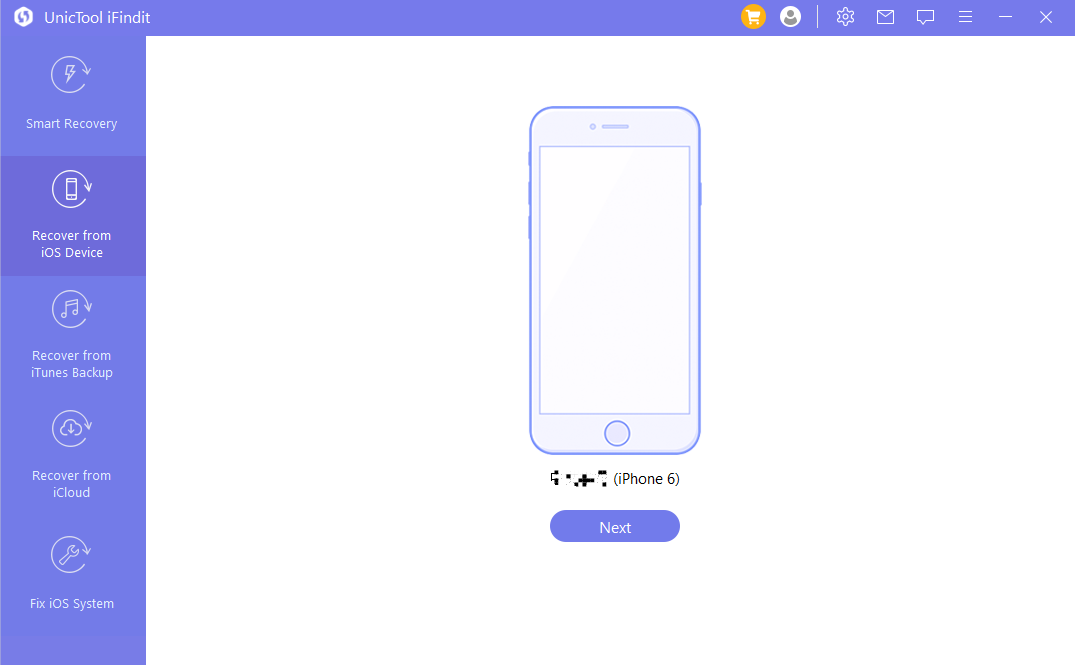
Click "Next" after iFindit successfully detects your device.
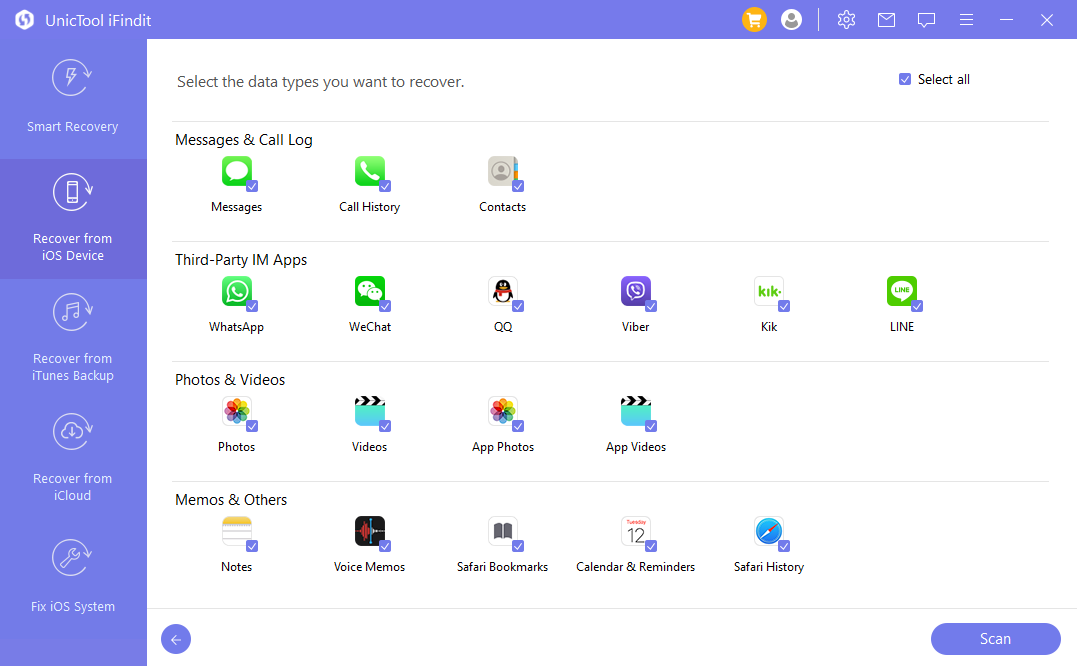
Select the data type you want to recover, and click the "Scan" button on the lower-right corner. iFindit will start to scan your device.
2Preivew and Recover Data
After the scan completes, all the recoverable data will be displayed on the screen. You can preview the data you want by double clicking it. And you can also choose to show the deleted files only. Select the files you want to recover, click the "Recover" button at the bottom right corner.
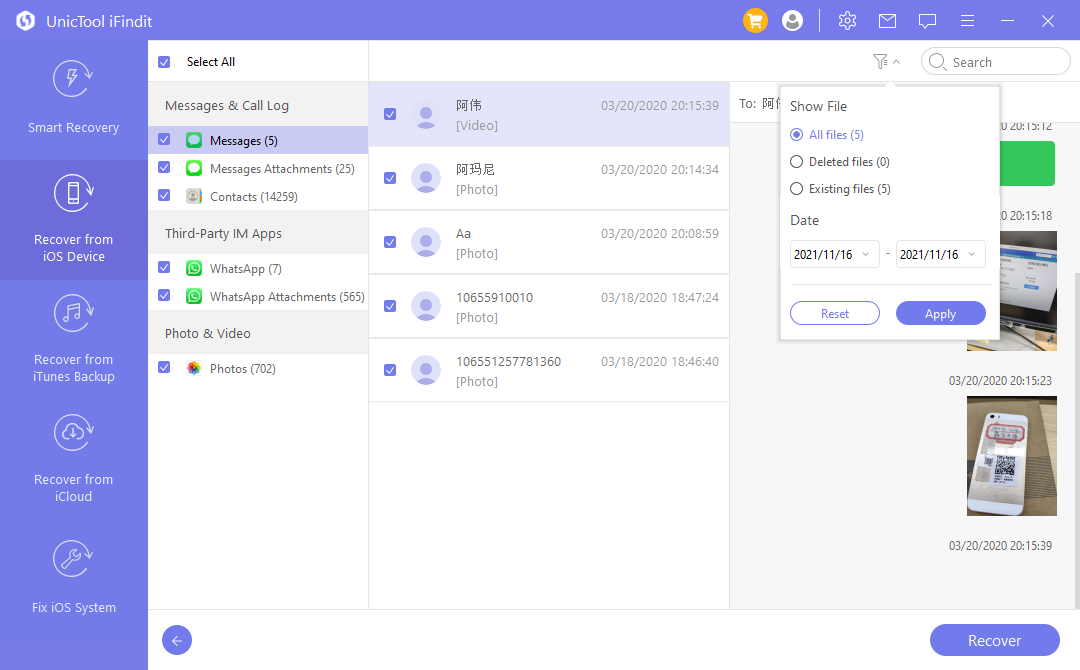
You will be prompted with a pop-up window to choose a location to store the recovered files. Please wait patiently as it will take a few minutes to finish.
Part 3. Recover from iTunes Backup
1Choose and Scan a iTunes Backup
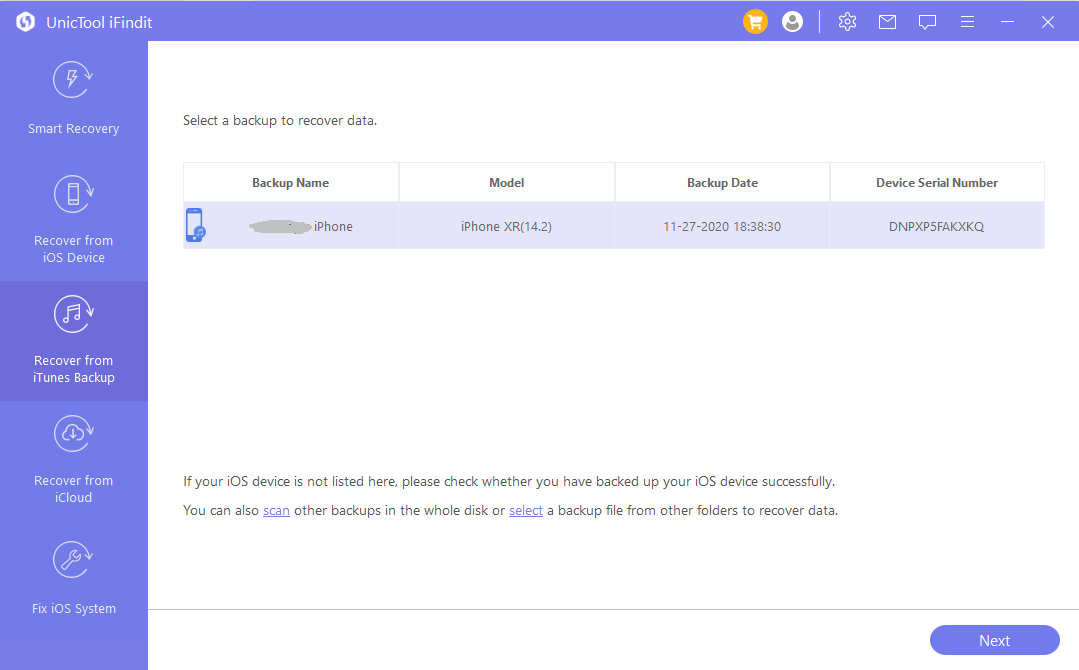
Choose an iTunes backup you've made before on this computer. If you choose an encrypted iTunes backup, you'll have to decrypt it first. Then, click "Next" to proceed.
Note: UnicTool iFindit also supports recovering data from a backup made by third-party backup program on the current computer.
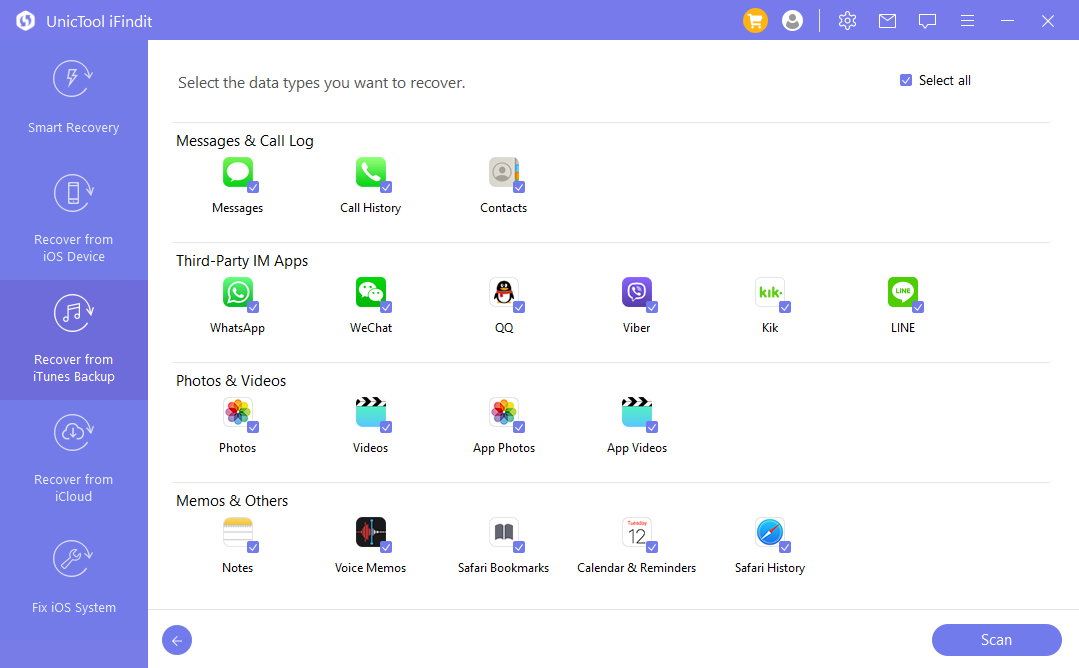
Select the data type you want to recover and click "Scan".
2Preivew and Recover Data from iTunes Backup
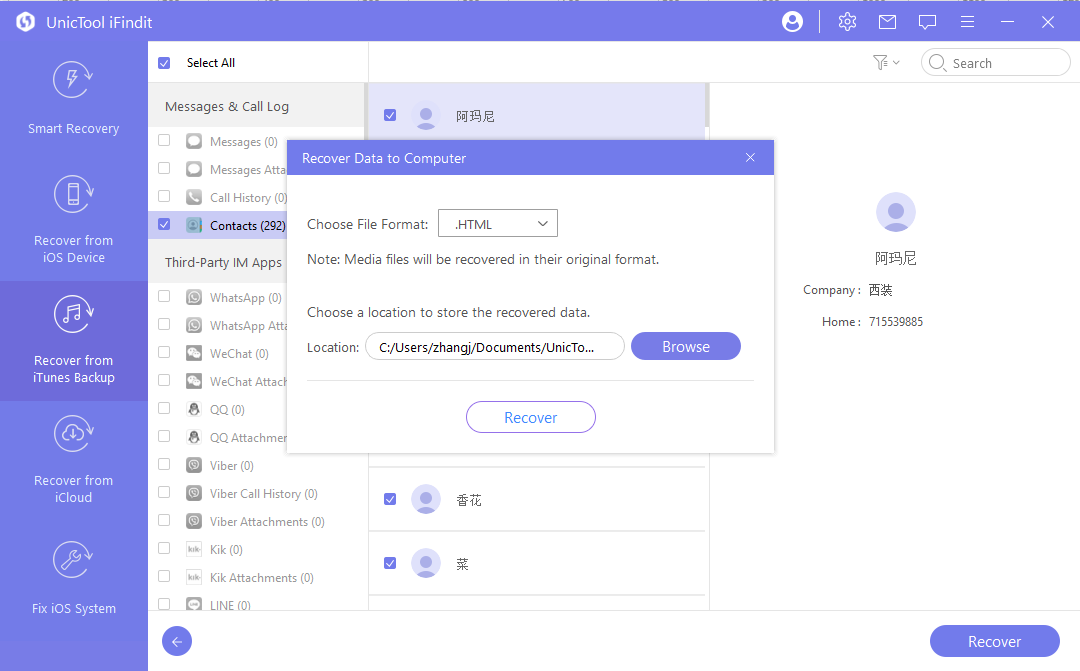
The scan result will be displayed on the screen after it completes. You can choose to show the deleted files only by clicking on the funnel icon in the top-right corner. Choose the files you want to recover, and click the "Recover" button.
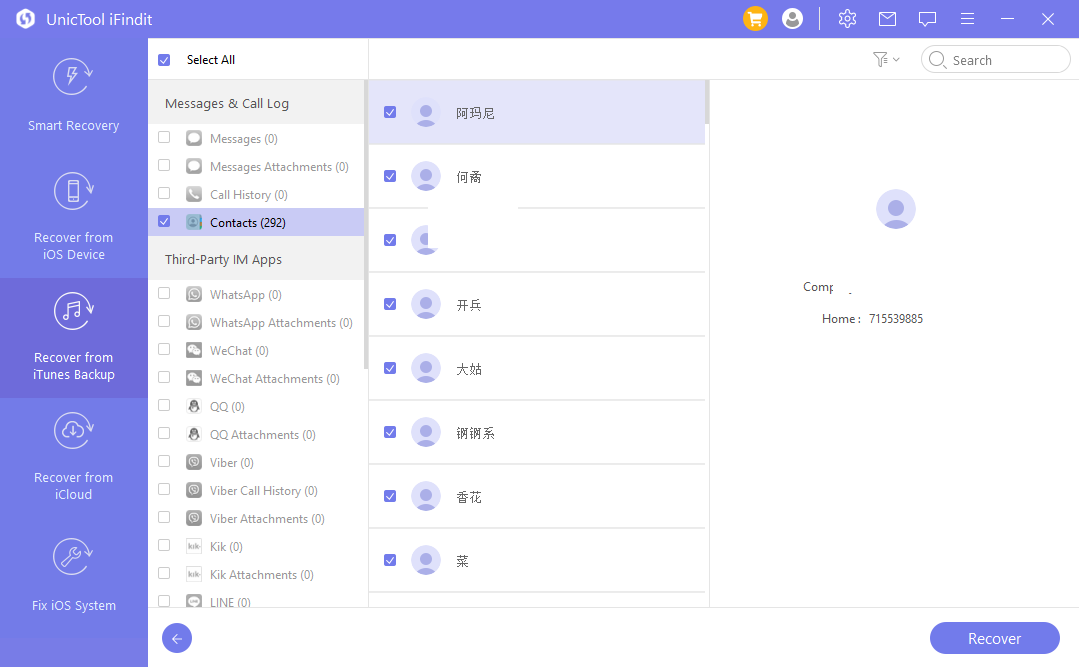
After that, you'll have to choose a path or create a folder in any hard drive you want to store these recovered files. You can check the recovered files after the recovery.
Part 4. Recover from iCloud
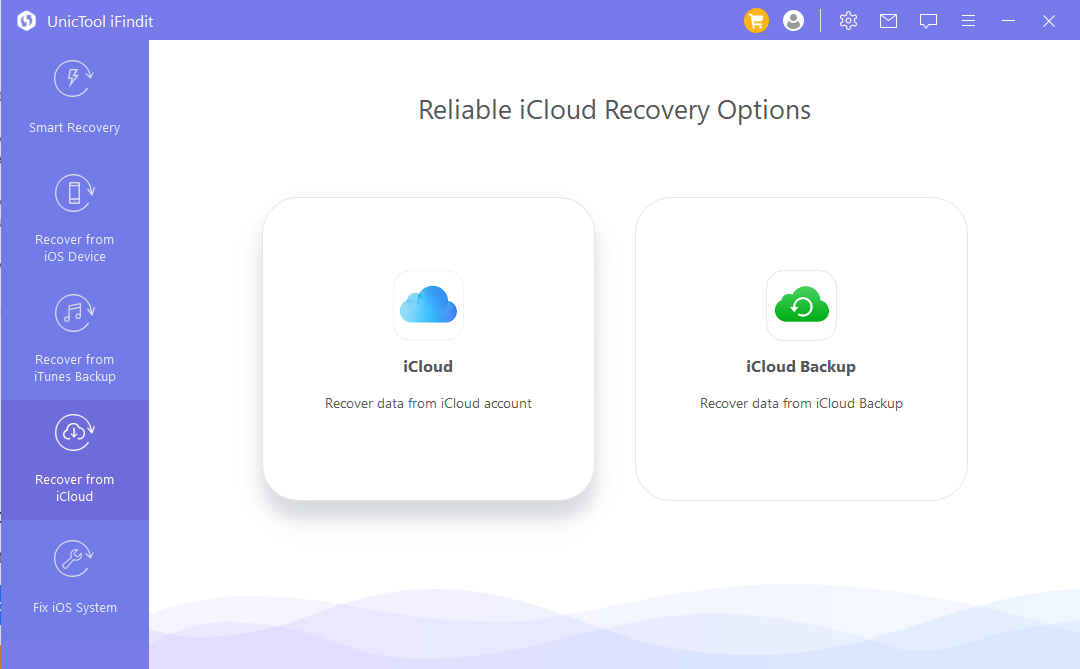
There are two options available in this module, including "recover from iCloud account" and "recover from iCloud backup". The former option enables you extract the synced data on your iCloud account, such as Contacts, Calendar, Photos, Notes, etc., but please note that it requires you to first enable an iCloud account on the iOS device. The latter option enables you to recover data from an iCloud backup you've made before. Check the following steps to learn how to recover data from iCloud using iFindit.
Option 1. Recover from iCloud Account
1Log in to iCloud Account and Choose Data Type to Scan
Choose "iCloud" from the given options on the "Recover from iCloud" module.
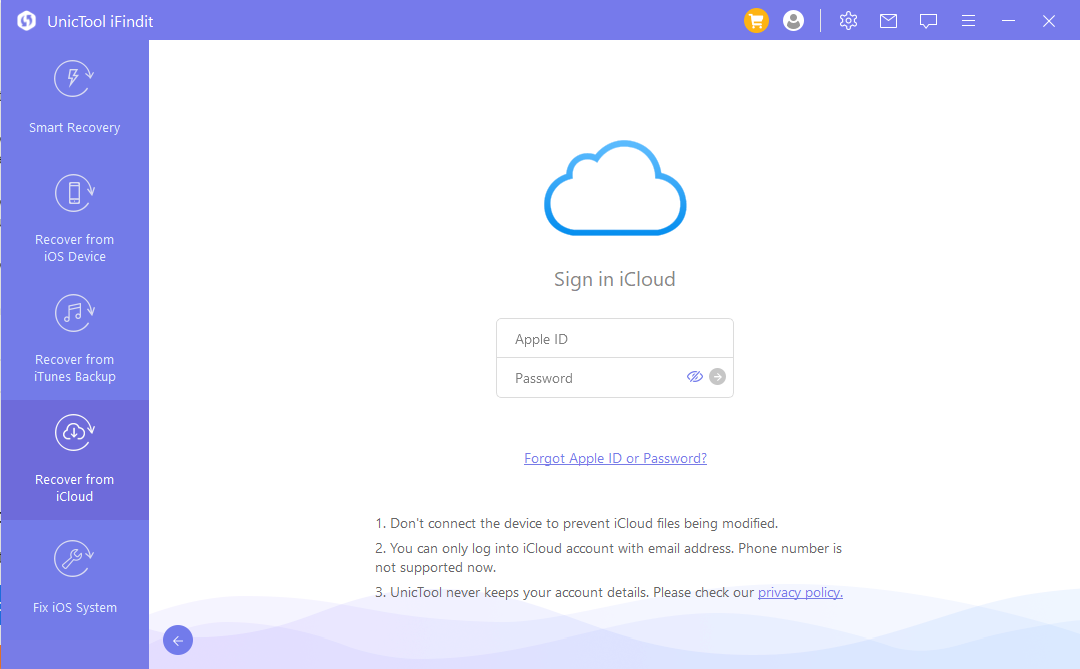
Enter your login details and sign into your iCloud account. You can be assured that UnicTool iFindit will never keep your account info for other purposes.
Choose one or more categories from the iCloud account, such as Contacts, Calendar, Photos, Notes, iCloud Drive, and iWork files. Then click the "Scan" button.
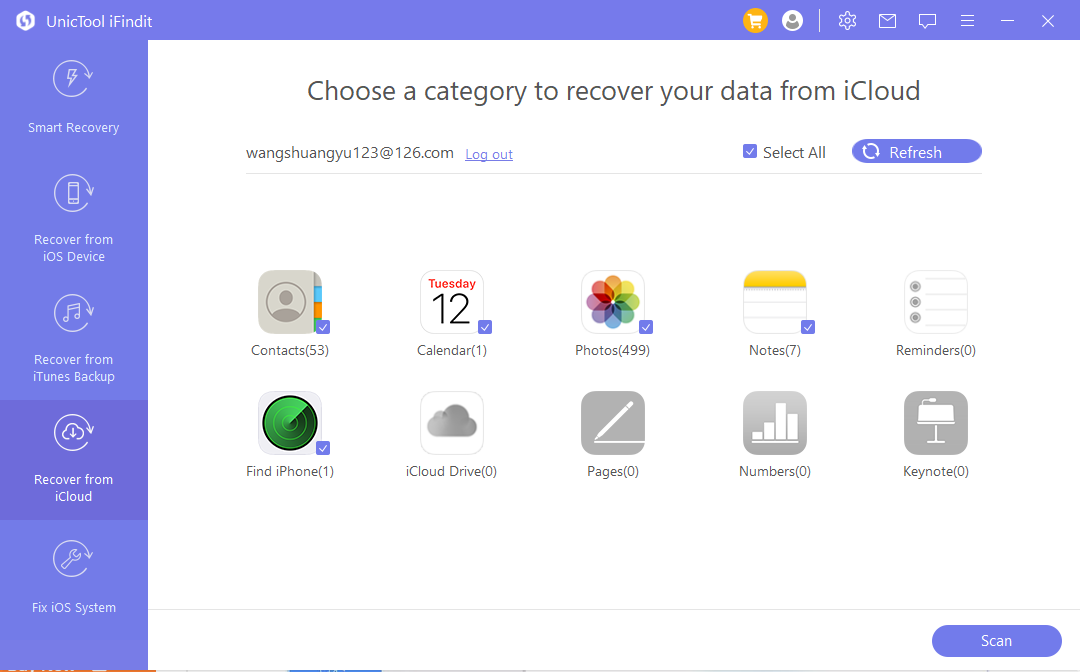
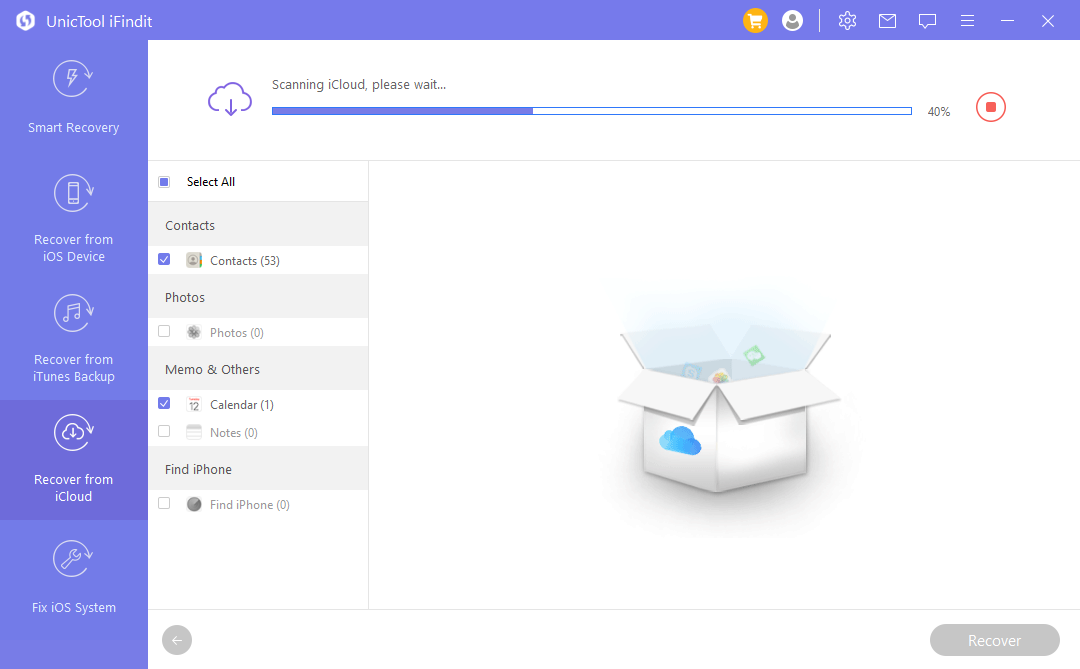
iFindit will scan the data you choose. It may take a while according to the file size, so please wait patiently.
2Preivew and Recover Data from iCloud
After it finishes the scan, all files found will be orderly displayed on the interface. You can preview and choose the data you want to recover and click the "Recover" button.
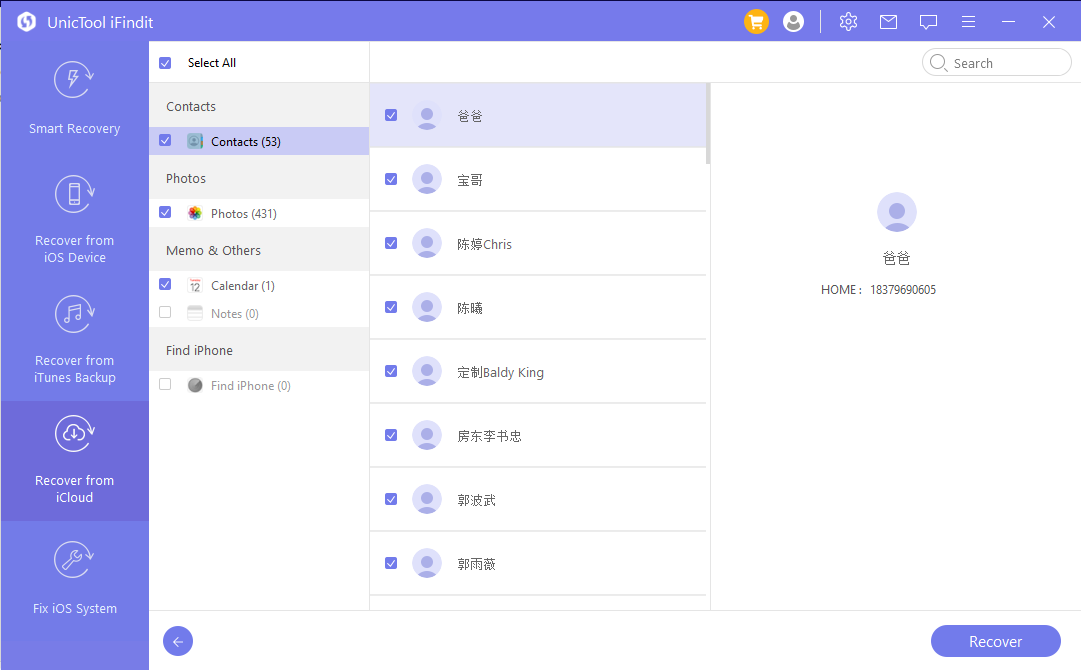
Finally, choose a path/location to store the recovered data.
Option 2. Recover from iCloud Backup
1Choose iDevice Status
Choose "iCloud Backup" from the given options on "Recover from iCloud" module.
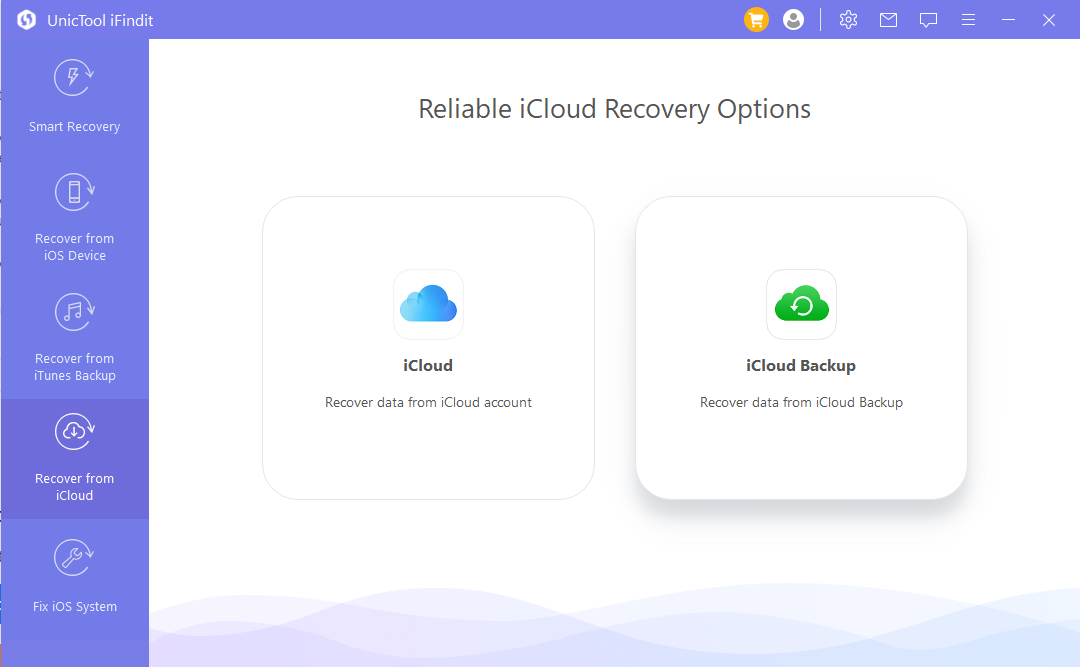
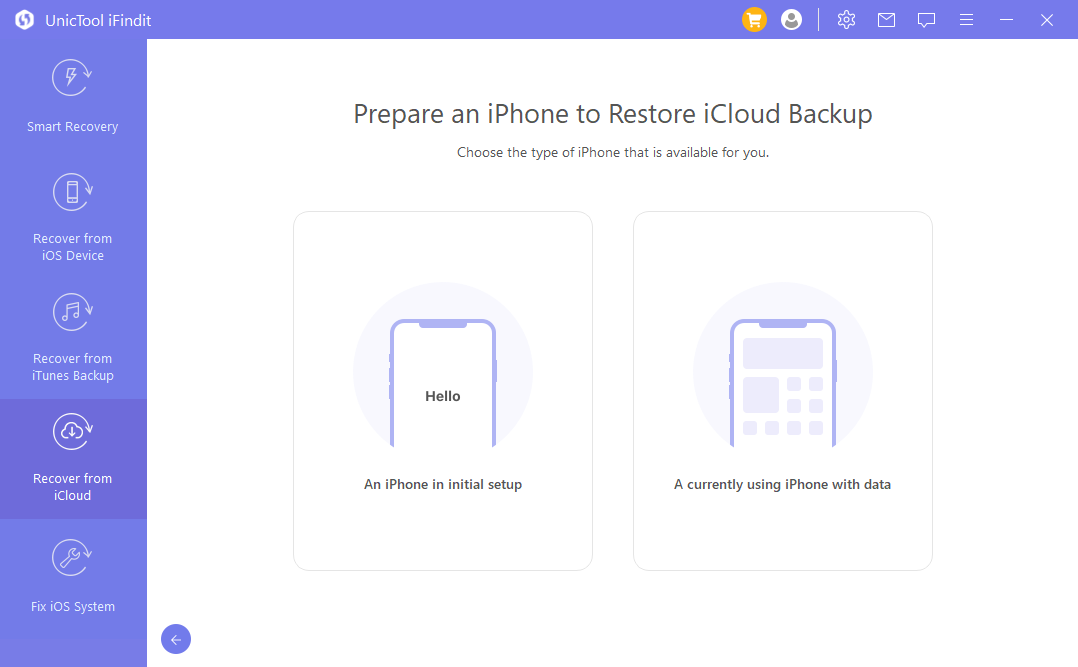
Choose your iDevice status according to your situation.
Note: You are required to reset your device before the recovery so, to avoid any data loss, please make a backup of the current data on your device first.
2Choose iCloud Backup to Restore and Scan Your Device
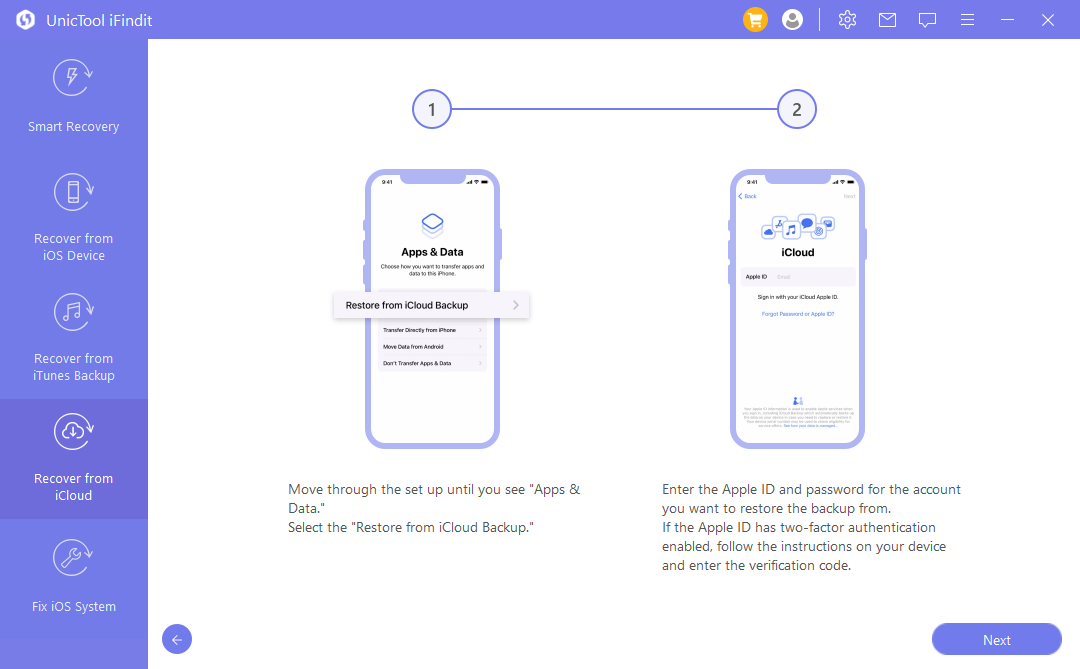
In "Apps & Data", select "Restore from iCloud Backup''. Input the correct Apple ID and password of the account for which you want to restore the backup.
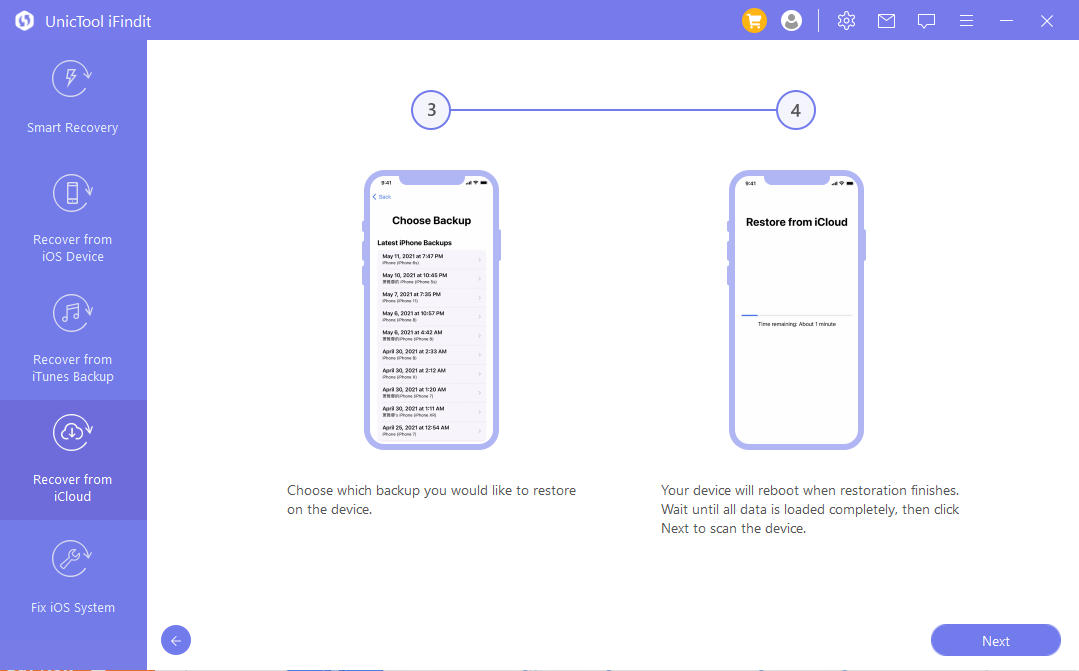
Choose the iCloud backup that you want to restore, follow the on-screen instructions on your device to complete the restoration.
Note: Please finish adjusting all settings and enter the iOS system after restoration so that iFindit can scan your device normally in the next step.
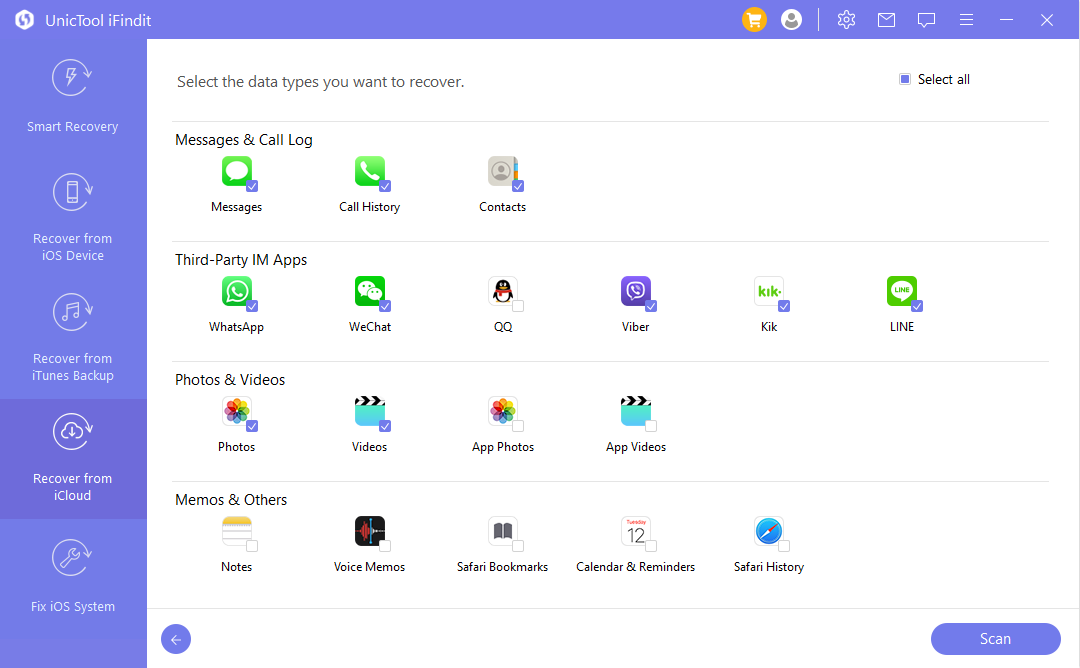
Connect your device to the computer and use iFindit to scan your device. All data found will be orderly displayed on the screen of iFindit. You should be able to view the recovered iCloud backup and find any lost data now.
Part 5. Fix iOS System
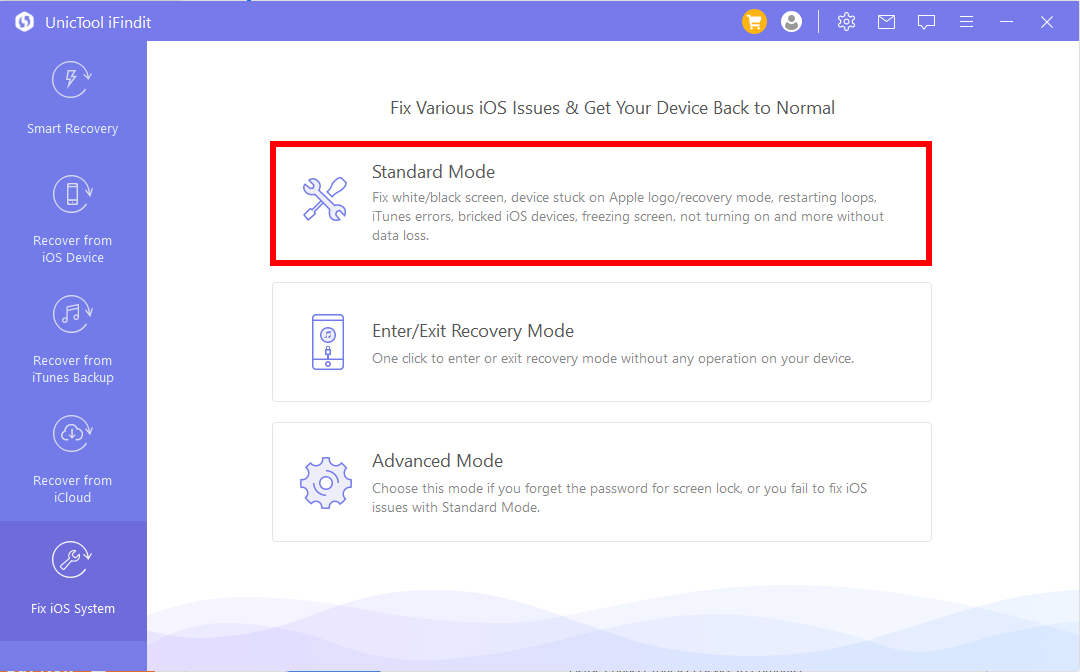
This function is designed to solve various system issues of iOS devices. This module offers 3 modes from which to choose:
1. Standard Mode: Used to fix common iOS issues, including a bricked iOS device, an iPhone frozen in DFU Mode, or iPhone frozen on the Apple logo/black screen/white screen/restarting loop, etc.
2. Enter/Exit Recovery Mode: Used to fix iOS devices stuck on Recovery Mode, or help to enter Recovery Mode.
3. Advanced Mode: Used to fix the issues that Standard Mode cannot solve. This will also work when you forget the device passcode. Follow the steps below to fix your iOS devices with "Fix iOS System" function.
Note:
After using this function, your device will be:
1. Upgraded to the latest iOS version.
2. Restored to the default status if you jailbroke the device before.
3. Unlocked if your device was locked before.
From the main window of iFindit, choose "Fix iOS System". Choose any mode from "Fix iOS System" according to your situation.
1. Standard Repair: Fix iOS Issues without Data Loss
1Connect Your Device to the Computer
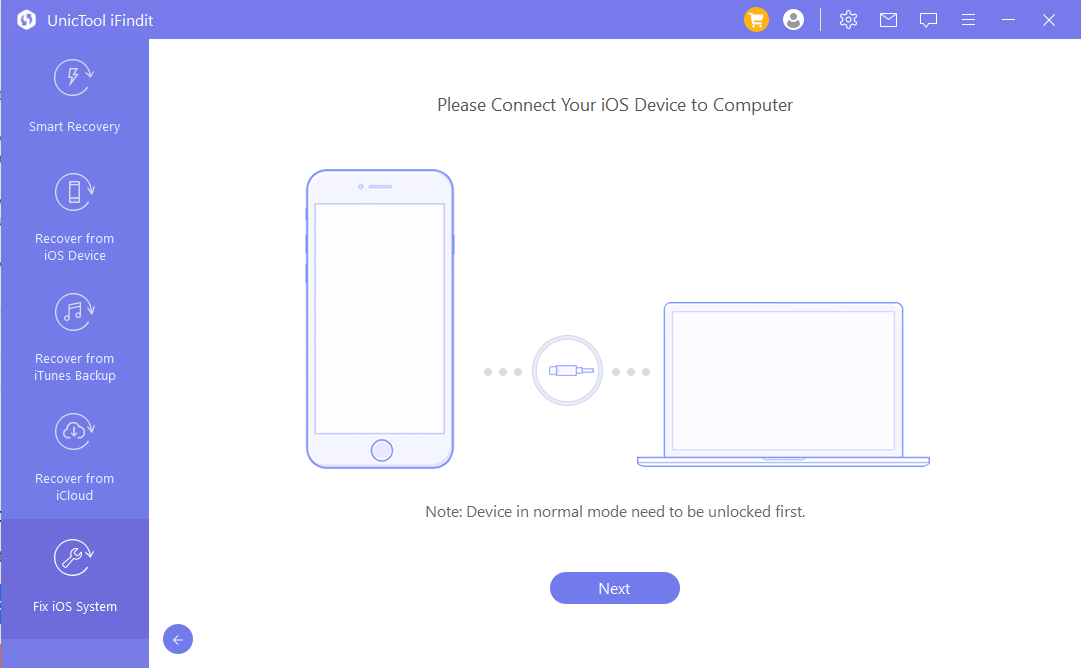
Connect your iOS device to PC/Mac, then click "Next". Generally, iFindit will proceed to the next step if it detects your device successfully, or you'll be prompted to put your device in DFU Mode or Recovery Mode first. Please follow the instructions.
• 1.1 Put your device in DFU Mode
Please follow the on-screen instructions to put your device in DFU Mode.
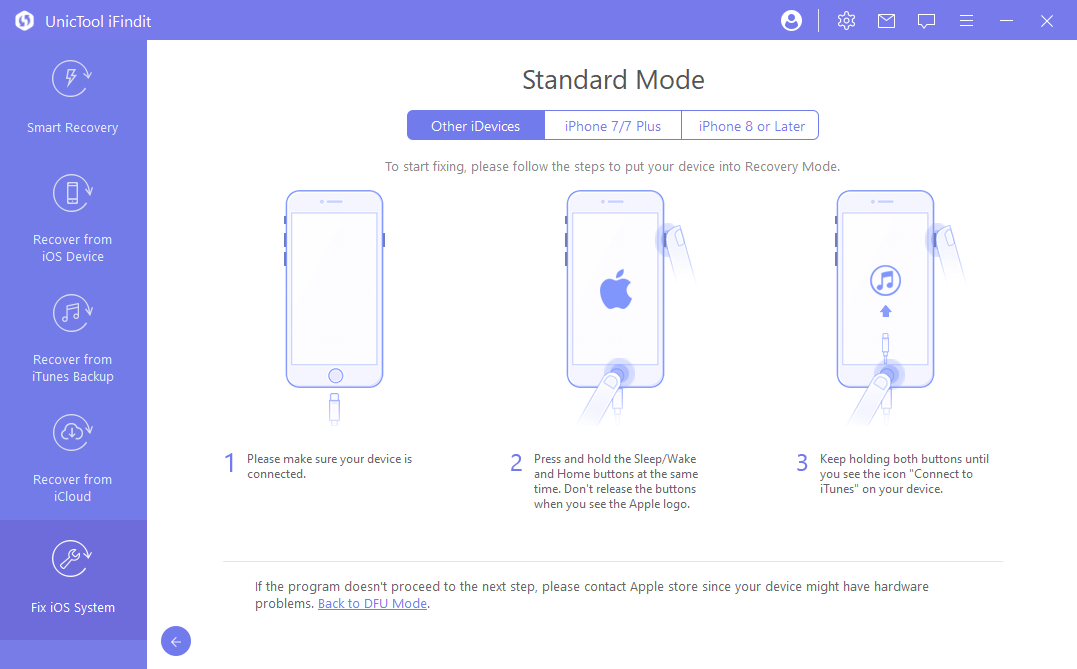
If your device fails to enter DFU Mode, please put it into Recovery Mode instead.
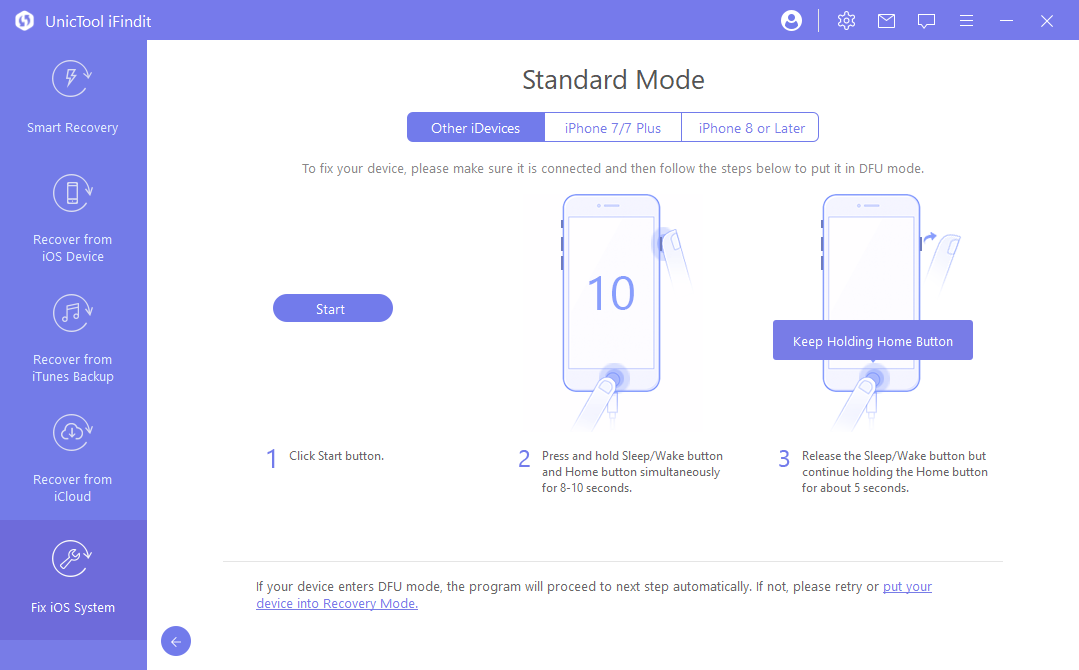
• 1.2 Put your device in Recovery Mode
Please follow the on-screen instructions to put your device in Recovery Mode.
2Confirm and Download the Correct Firmware
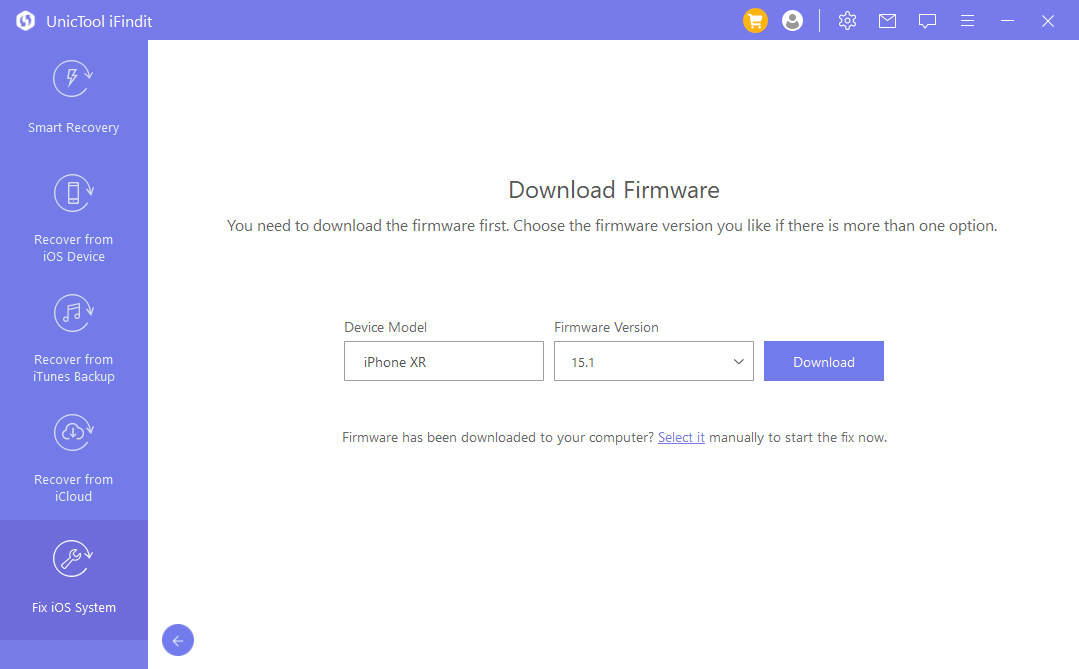
After you have entered the DFU or Recovery Mode successfully, iFindit will detect your device and provide the firmware of the latest iOS version. You'll need to confirm the firmware and click "Download".
3Start to Fix
Click "Start to Fix" and the program will fix your iOS system automatically.
Note: If your device is out of DFU or Recovery Mode, you'll have to follow the steps mentioned above to re-enter the DFU/Recovery Mode.
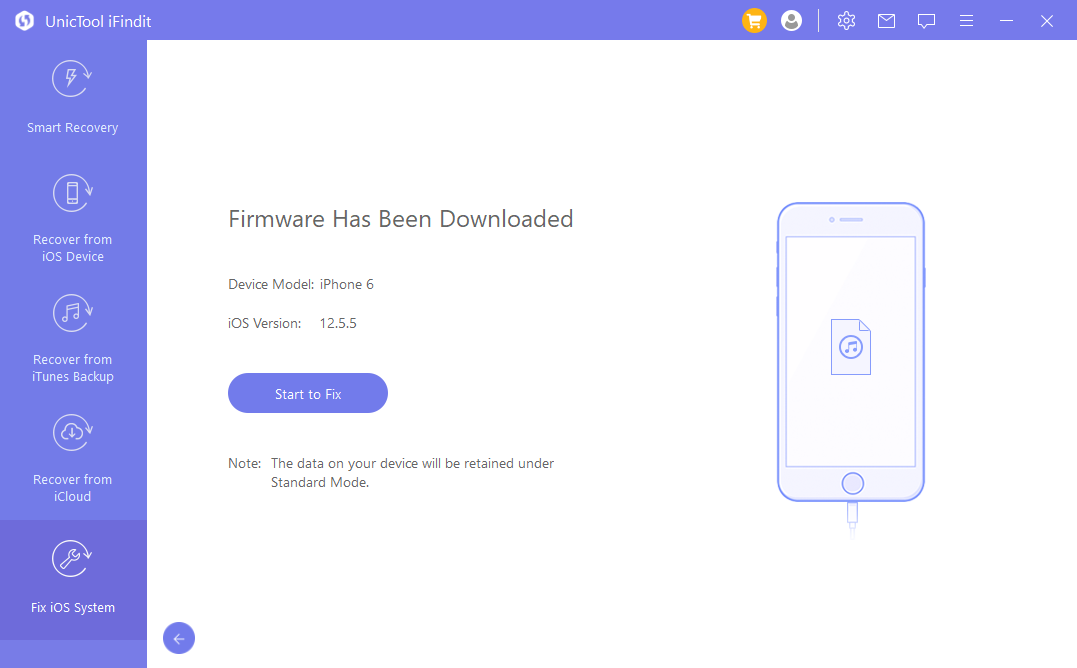
It might take 10 minutes. Please wait patiently.
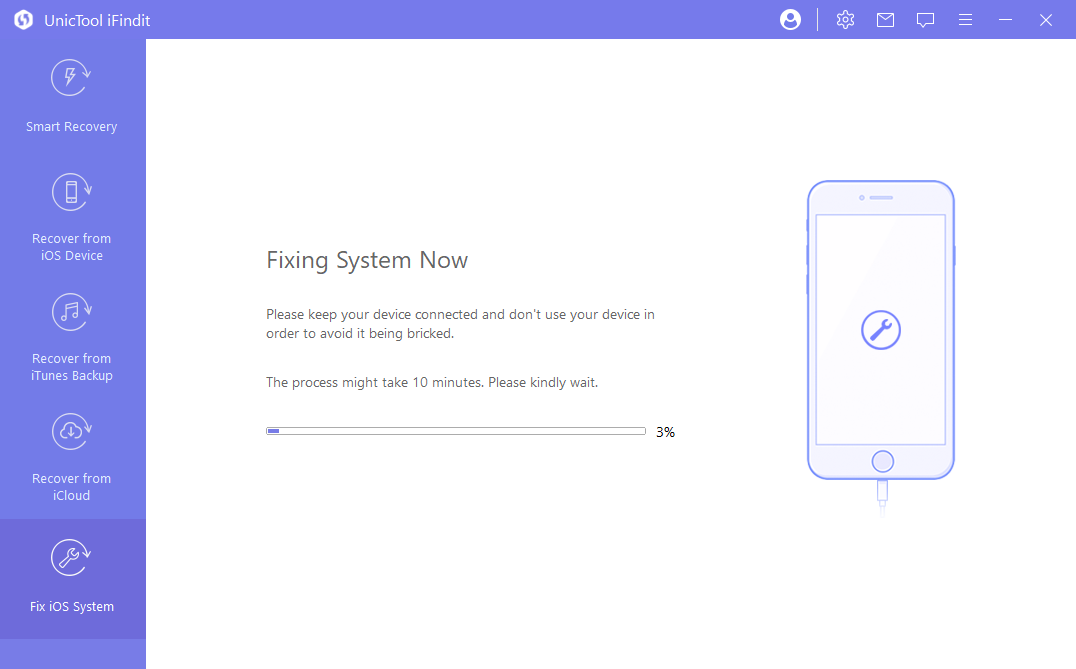
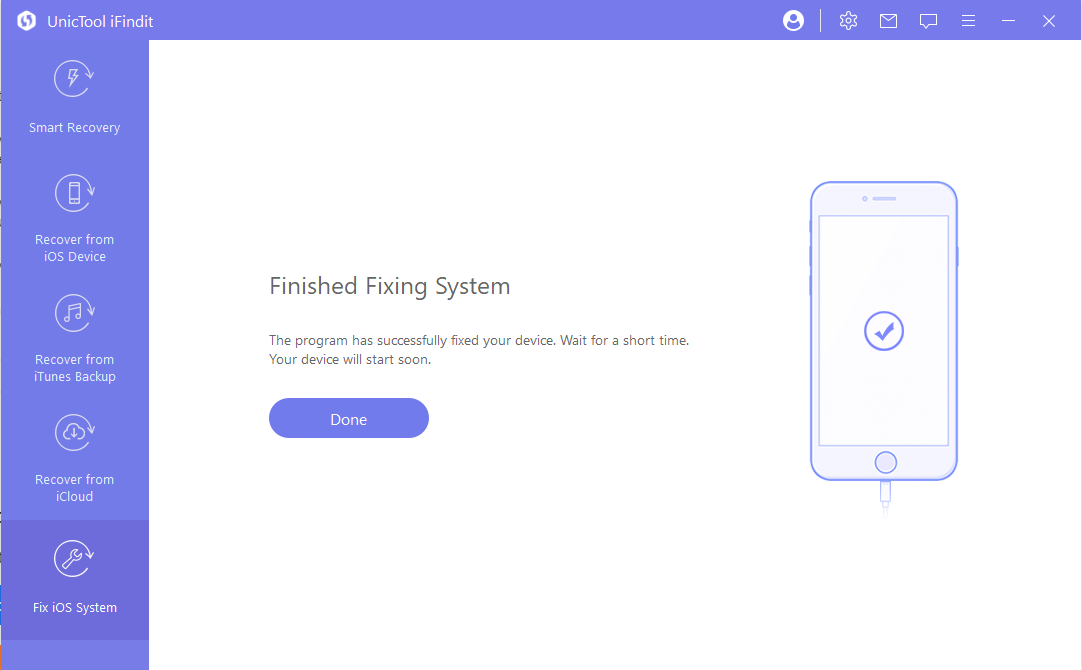
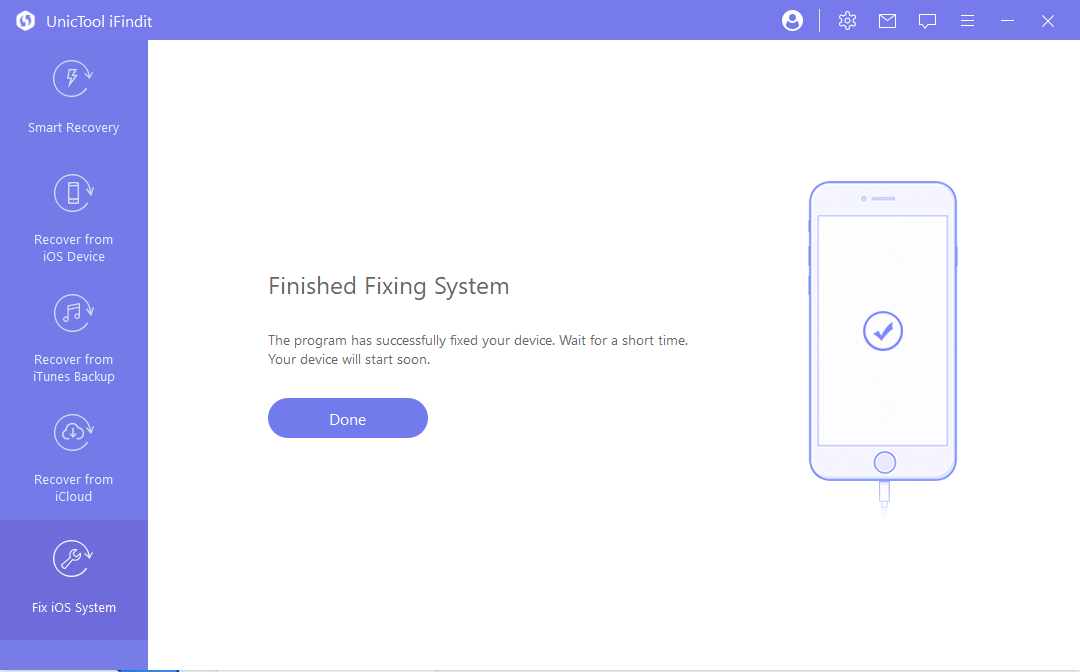
Once it finishes the fixing process, please check whether your device can restart. If not, please try to repair it again, or use the "Advanced Mode" instead.
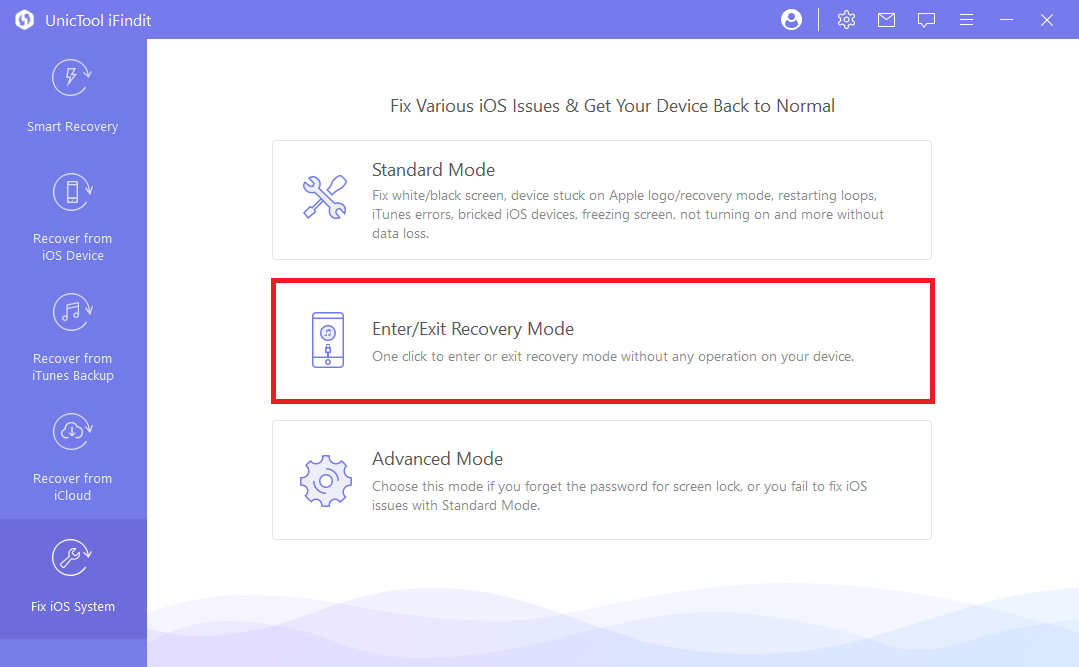
2. Enter/Exit Recovery Mode: 1-Click to Enter/Exit Recovery Mode
Choose "Enter/Exit Recovery Mode".
• 2.1 Enter Recovery Mode
Connect your device to the computer and click "Next".
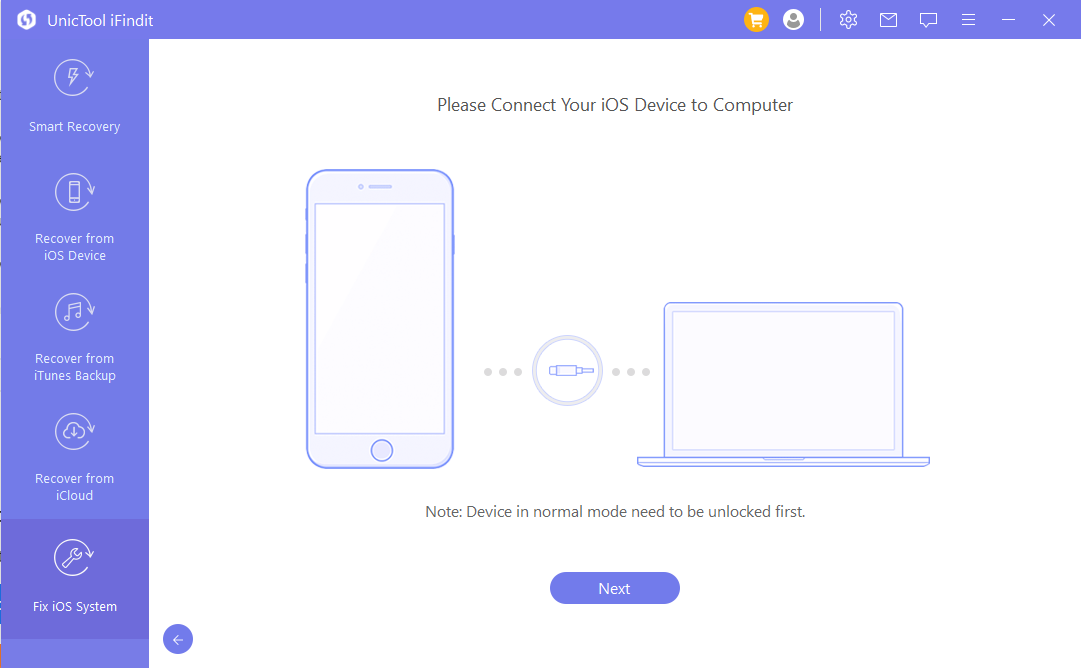
Click "Enter Recovery Mode" to put your device into Recovery Mode.
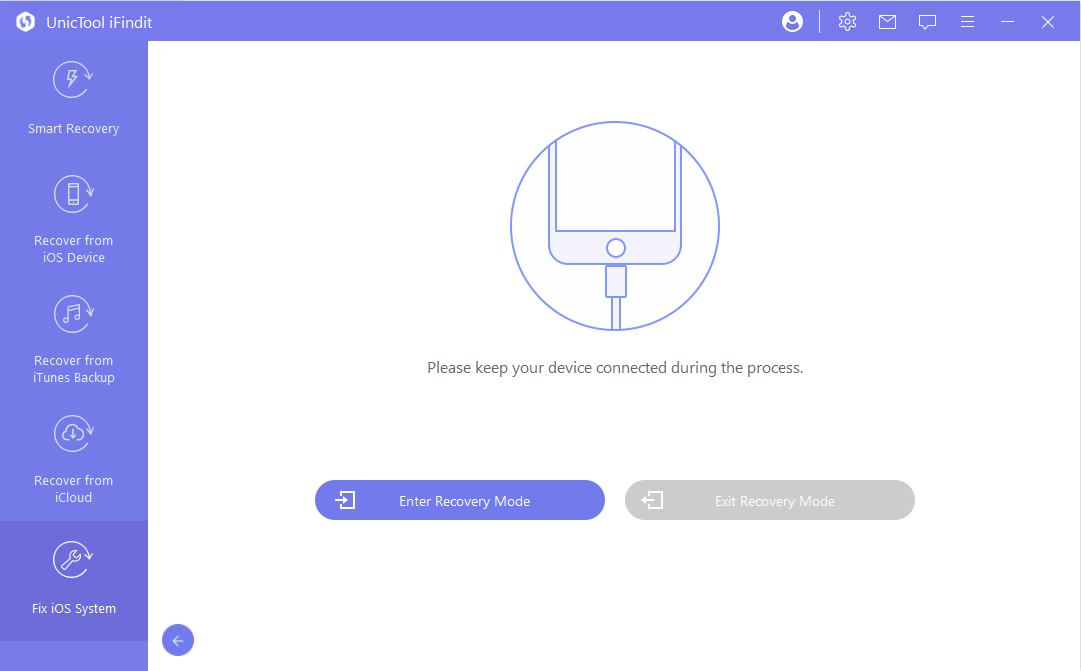
• 2.2 Exit Recovery Mode
Make sure your device is connected to the computer and click "Continue".

Click "Exit Recovery Mode" to leave Recovery Mode. This process will take a while and then your device will reboot.
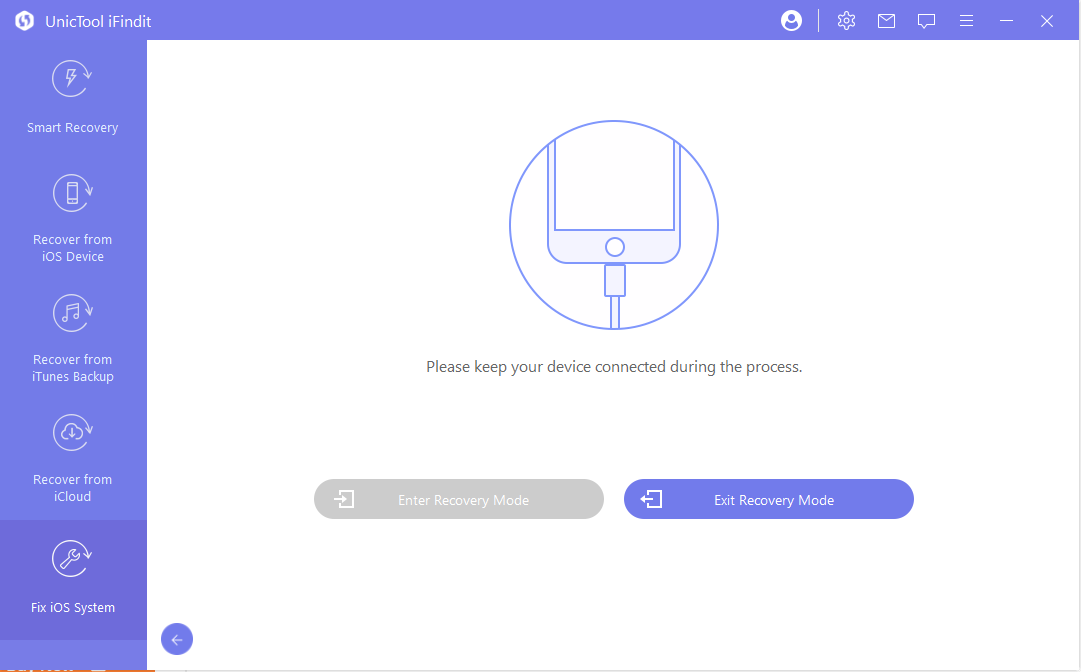
Note: If your device fails to restart, please try again or use the "Standard Mode" to exit Recovery Mode.
3. Advanced Mode: Reinstall Your OS Completely
If Standard Mode fails to fix the issues, then choose "Advanced Mode" and follow the steps below.
Note: Your OS will be reinstalled and all data on your device will be erased by using this mode. It's suggested to back up your device before starting.
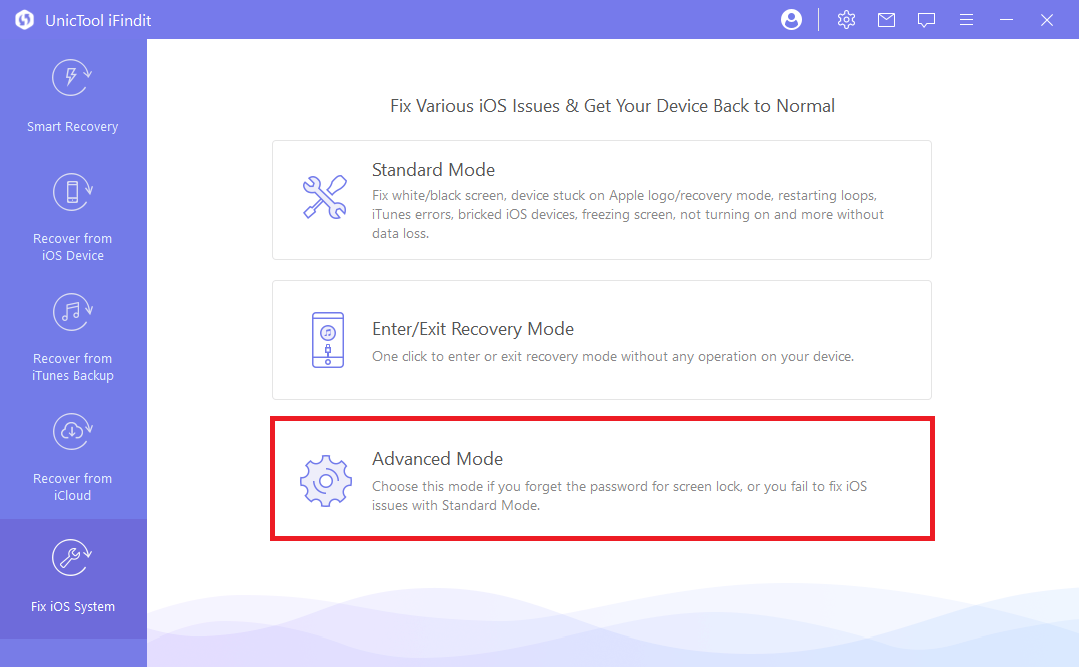
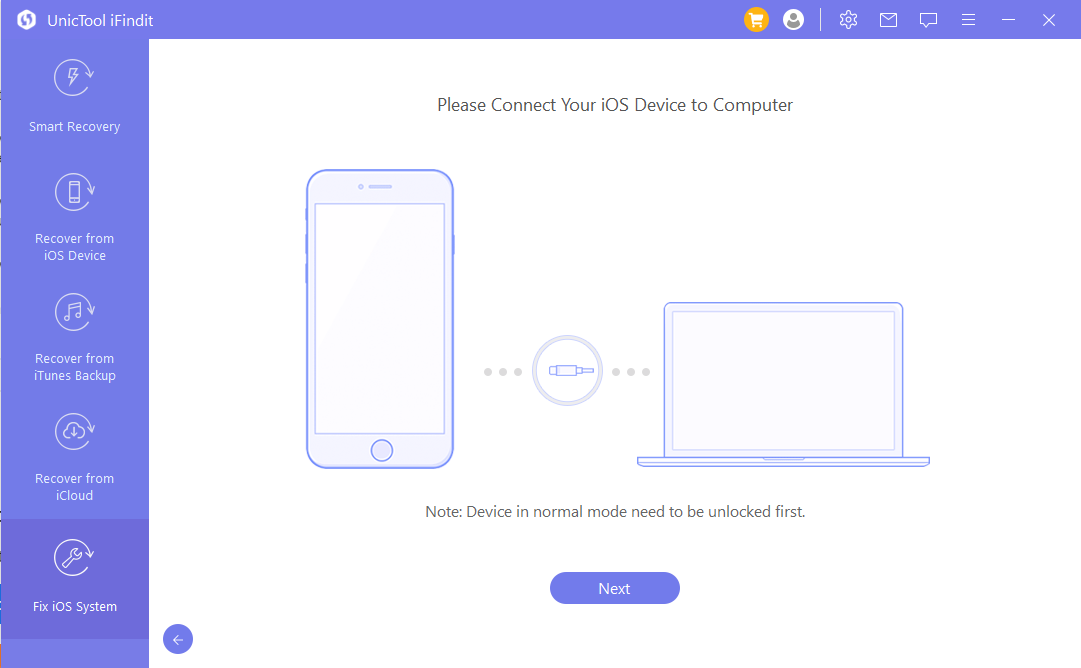
Connect your device to PC/Mac.
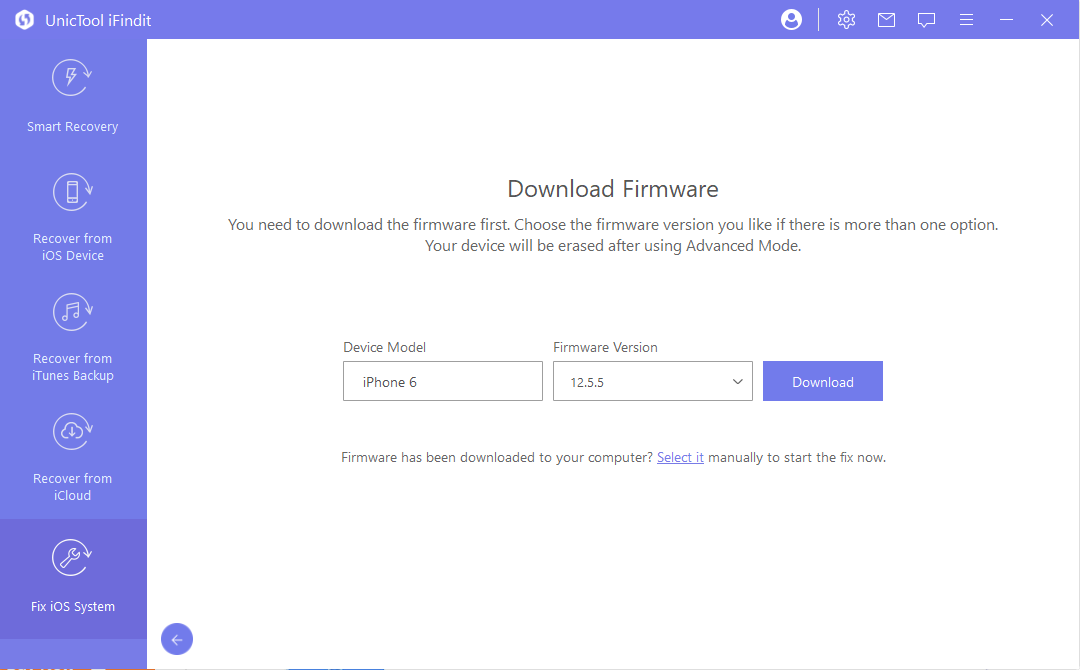
Confirm and download the corresponding firmware for your device.
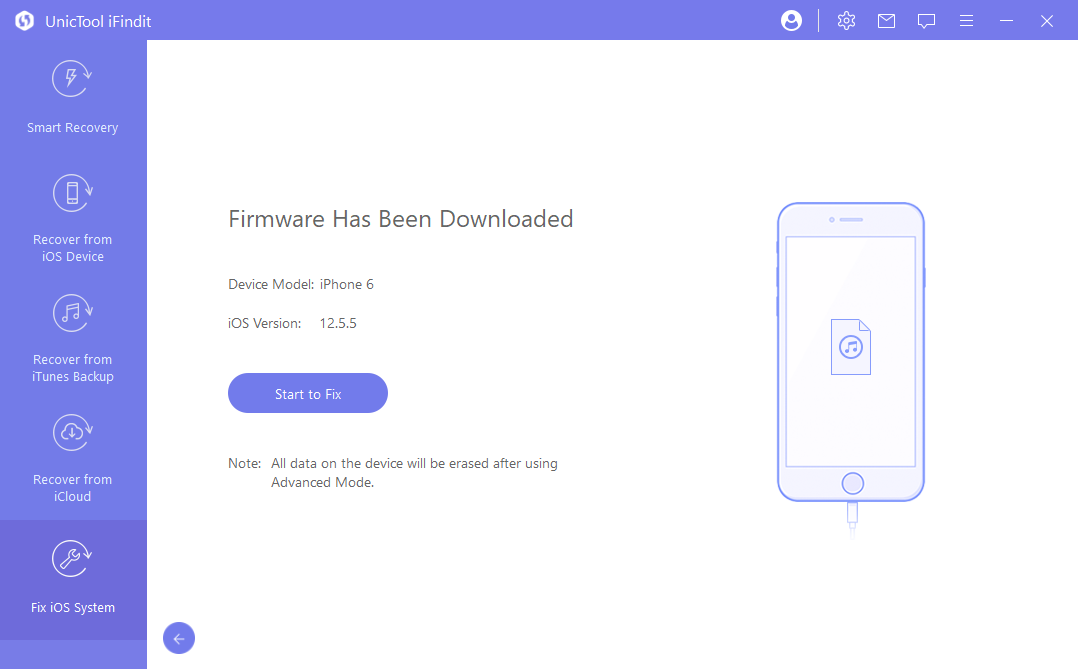
Click "Start to Fix" and the program will fix your device automatically.
It might take a while to fix your device.
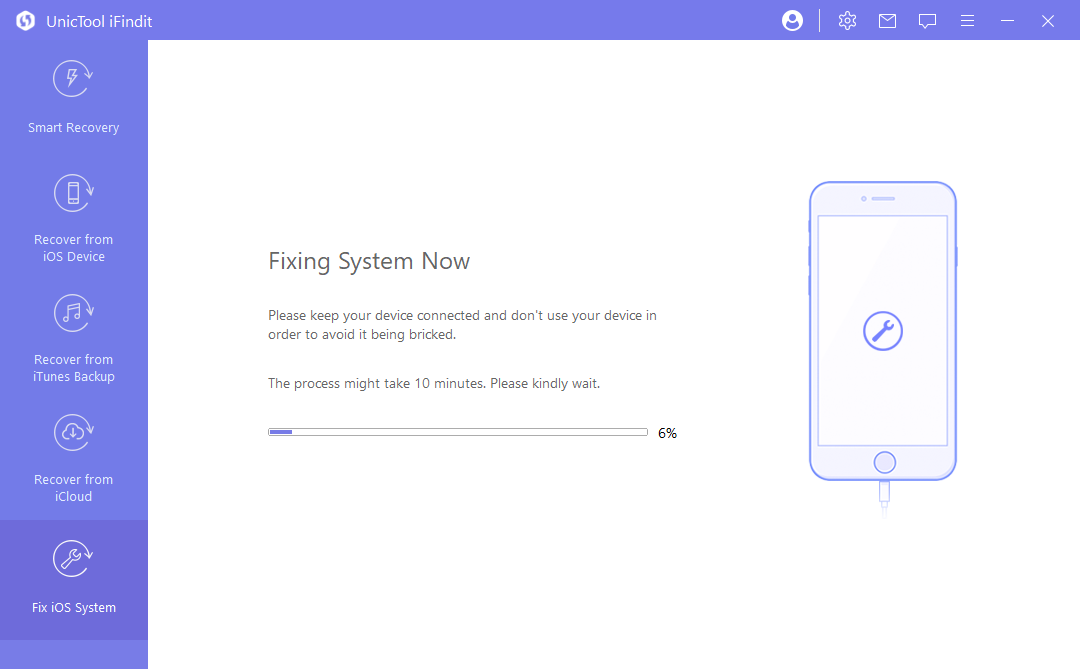
Your device will restart automatically after being fixed successfully.
Hi, is it helpful?
Absolutely!
Not really...
Thanks for your kind feedback!