A disabled iPad is practically like a house you have been locked out of. It has all of your properties in it, but you have no access to them, probably because you misplaced your key or the lock is bad. With your iPad, it becomes disabled when you enter the password wrongly six times in a row. It does this to help protect your data from whom it perceives as an intruder.
Normally, when an iPad is connected to a PC via iTunes, you will be required to enter the password of your device so that iTunes can access the data. If it is disabled, you cannot enter the password, and the iPad won't connect to iTunes even you have trusted the computer before.
So how to fix the disabled iPad won't connect to iTunes problem? Read on to find the answer!
Method 1. Put iPad into Recovery Mode
Method 2. Use Umendit to Fix iPad System Issues NOW
Method 1. Put iPad into Recovery Mode
To carry out this method, you must have first connected the iPad to the PC on which you want to launch iTunes or Finder, i.e., a trusted device. This is because, only a trusted PC can connect to a disabled iPad, and a PC cannot be made a trusted device when the iPad is disabled.
In the very beginning, launch iTunes on your computer, and if you have macOS Catalina 10 or 15 or later, you will have to open Finder. Then put your iPad in Recovery Mode. There are different methods to do this for the different types of iPads:
- For an iPad without the Home button, press the Top button and Volume Down button simultaneously and hold them until the slider to power off the iPad appears, then turn off the device. While holding the Top button, connect your iPad to your PC and continue holding the button until the recovery mode screen appears on the iPad.
- For an iPad with the Home button, press the Power button and hold it down until the slider to power off the iPad appears, then turn off the device. Hold the Home button and connect your device to your PC, and continue holding it until the recovery mode screen appears on the iPad.
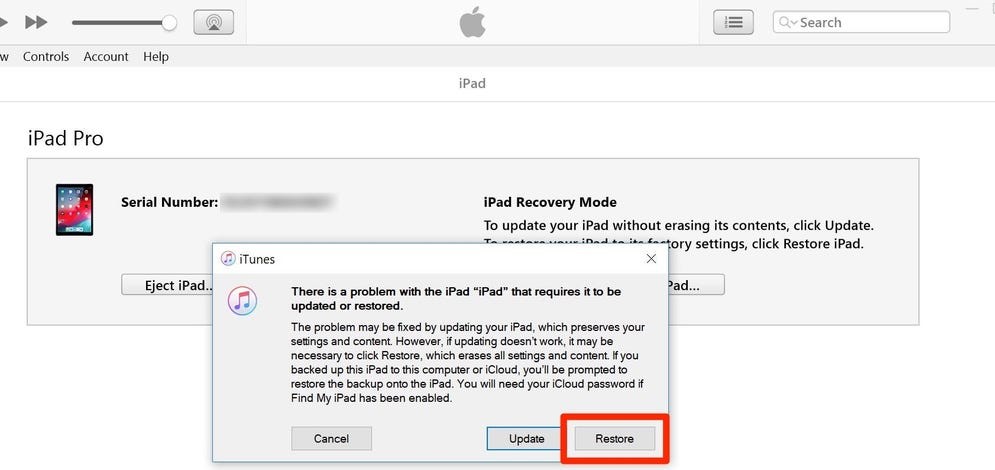
A pop-up will display on the screen of your PC, choose Restore. Then iTunes/Finder will wipe your device and download the latest iPadOS version.
Method 2. Use Umendit to Fix iPad System Issues NOW
If you think that your iPad could be having operating system issues, then this professional iOS system repair tool Umendit is here to help you fix the "iPad is disabled and won't connect to iTunes" issue without data loss.
Umendit is an all-in-one software can help you fix any iOS system issues such as iPhone is disabled, iPhone stuck on the Apple logo, boot loop, stuck on spinning wheel, black screen of death and white screen of death. As an user-friendly tool, it also has a high rate of success. Most importantly, it can bypass all kinds of iTunes errors.
Secure Download
Simple Steps to Fix iPad Issues with Umendit:
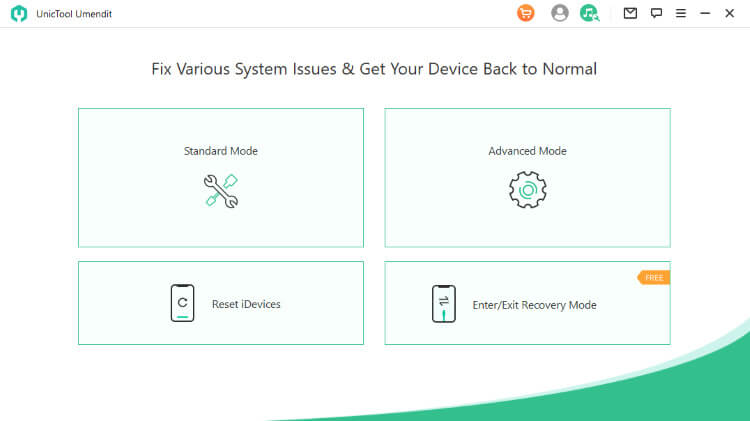
- 1 Download and install the Umendit and launch it on your PC. Then choose Deep Repair.
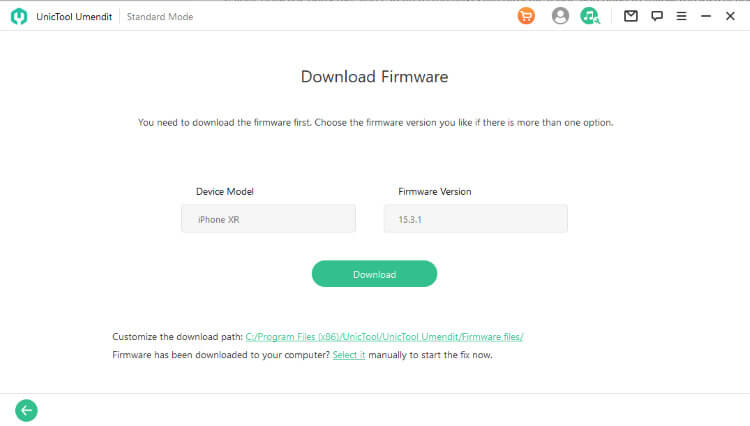
- 2 After successfully detecting your device, download and choose the most suitable firmware for your iPad. Click on Next.
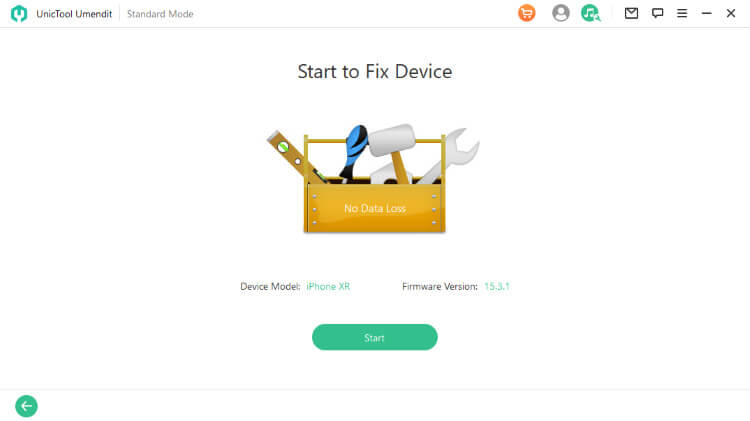
- 3 After the firmware has been downloaded, a Start button will appear on the screen. Click and wait to see a successful message and for iPad to start rebooting.
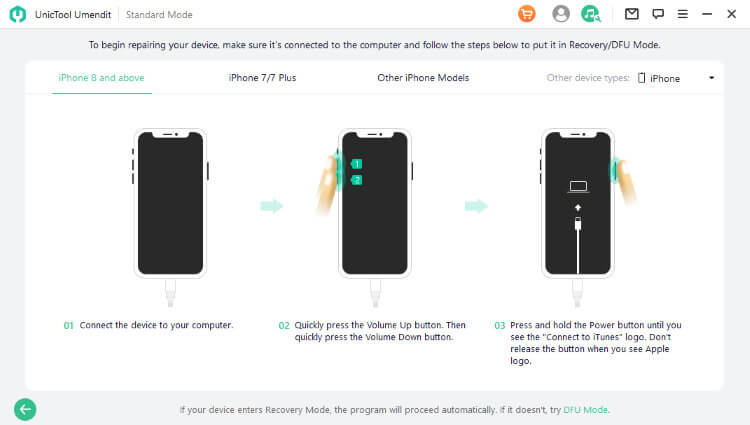
Connect your iPad to a computer with a USB cable, and if the software detects your device, you are free to move on to the next step. If the software does not detect your device, follow the on-screen instructions to put your iPad in Recovery/DFU mode.
Method 3. Erase iPad via iCloud
If your iPad is disabled and won't connect to iTunes, you can factory reset the iPad remotely with the Find My iPad feature. To use this feature, your iPad must be logged in to your iCloud account, and the Find My iPad option must also be turned on. You should also use the computer that your device has trusted before.
- Go to https://www.iCloud.com on any browser on your PC or open find iPad on any other iOS device with iOS version 8 or later.
- Log in to your iCloud account with your Apple ID.
- Once you are logged in, choose Find My iPad, then choose All Devices, and select your iPad from the list of devices provided.
- Choose Erase iPad and confirm this by filling in your Apple ID and password.
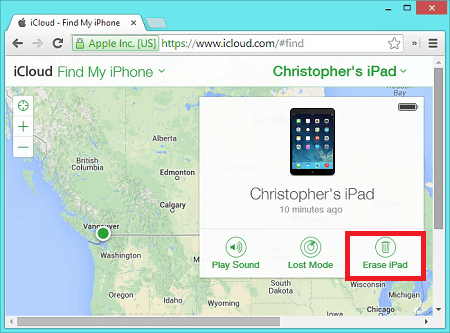
This method will reset the disabled iPad to default settings and will wipe all data previously stored in the device, but you can restore the data and settings if you had backed up the iPad via iTunes.
In case you didn't have the backup, we strongly recommend that you try out Umendit's Standard Repair to help you out with the "iPad is disabled" situation without data loss.
Method 4. Contact Apple Support
You could also contact the official Apple support team to help you out when you are experiencing a disabled iPad that won't connect to iTunes. At the Apple support center near you, a team of experienced technicians will carry out a detailed check on your device to ascertain the problem. If your iPad is still under warranty, this will be done for free.
Conclusion
An iPad can be restored if it is disabled and won't connect to the iTunes using various methods. We highly recommend that you try out Umendit to restore your disabled iPad back to normal working state. This all-in-one tool has a user-friendly interface; you don't need to be a technical expert to get started with Umendit. Just download and give it a try!
Secure Download
