We've all been there - you forgot your iPad passcode, and now you can't get into your device. We know how frustrating it can be. And what's worse is that your iPad may get disabled thoroughly if you enter the wrong passcode too many times. The most common way to unlock iPad passcode is to restore it using iTunes, but obviously that will result in complete data loss.
Luckily, you don't have to panic – it is possible to unlock iPad passcode without losing all of your data. In this article, we'll explain the methods about how to unlock iPad passcode without restore. Let's dive into it now!

Part 1. Will Restoring iPad Unlock It?
iPad has been one of the most popular electronic devices and has had millions of users over the past few years. But what happens when your iPad is locked and you've forgotten the password? Can you unlock it by restoring it?
The simple answer is yes. Restoring an iPad will unlock it. That's because when you restore it, all the settings are factory reset, thereby it erases the passcode as well. Hence, no passcode means you'll be able to unlock it and start using it as you wish.
Part 2. How to Unlock iPad Passcode Without Restore?
1. Use Professional Third-Party Software - LockEraser
When you've forgotten your iPad's passcode, you need to go through the hassle of resetting it. Is there an easier way? In fact, there are a number of third-party tools available in the market that can help you unlock iPad without much hassle, and UnicTool LockEraser tops the list.
As a one-stop iOS device unlocker, LockEraser can unlock not only your iDevice screen passcode, Screen Time passcode, Apple ID, but can also bypass MDM. And what makes it more convenient is that you can do all that just by yourself at home.
- Unlock iPhone/iPad/iPod in various scenarios easily.
- Unlock Apple ID, screen passcode, Screen Time passcode and MDM lock effectively.
- User-friendly for everyone; requiring no technical skills.
- Work seamlessly for all iOS versions and models.
- Offer free trial to every new user for initial experience.
Secure Download
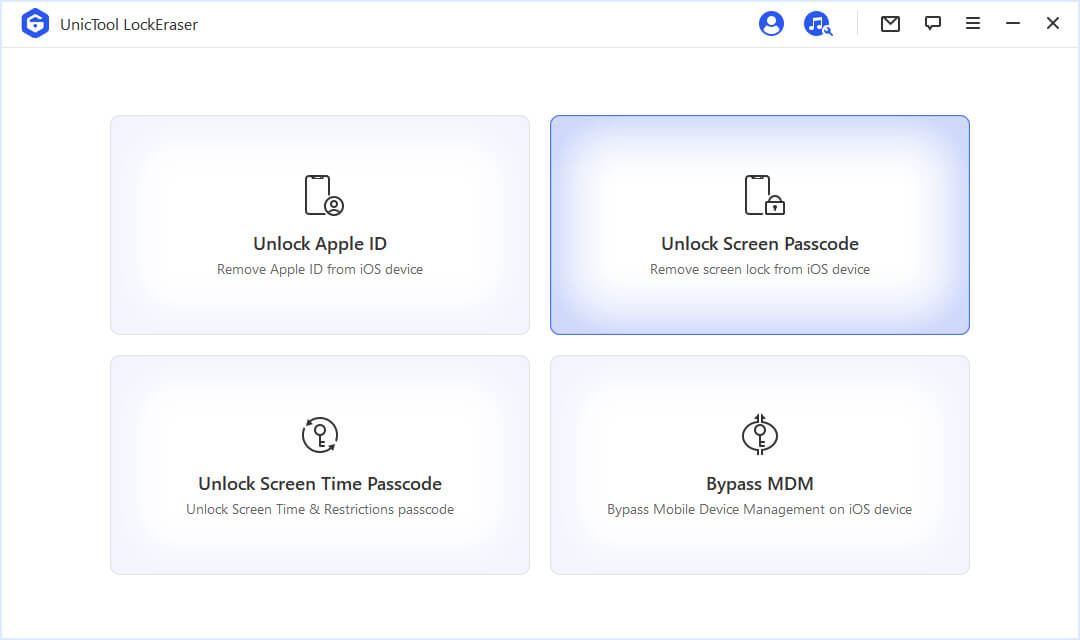
- 1 Download, install and launch LockEraser on your computer. Select "Unlock Screen Passcode" mode.
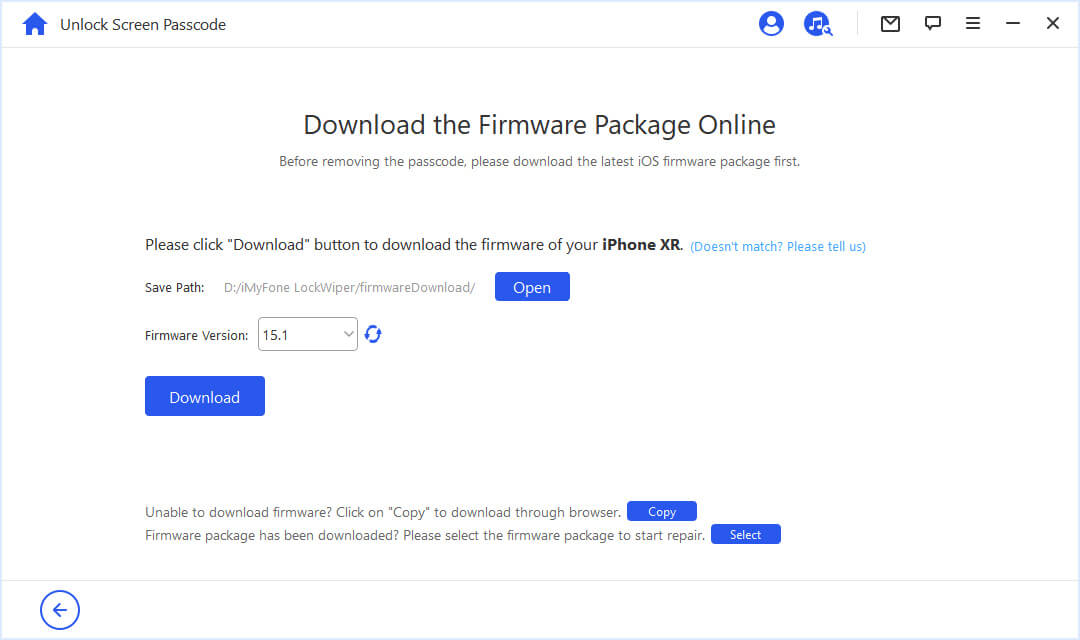
- 2 Choose the firmware version provided based on your device model and click "Download". Then wait a few minutes for LockEraser to download and verify the firmware package.
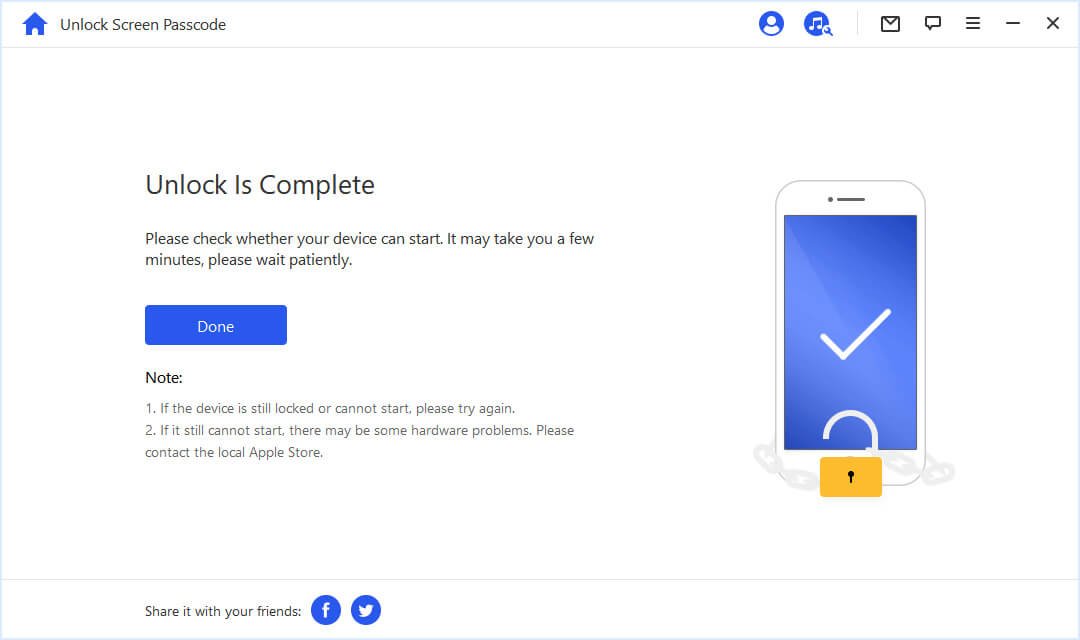
- 3 When the extraction is completed, click the "Unlock" button. When the unlocking work is done, you will see the notification on the screen.
2. Use Siri
You've probably already discovered how much fun it is to use Siri. You can do things like control your music, get directions, and make phone calls without ever having to take your hands off your iPad.
But do you know that Siri on your iPad can also help you unlock iPad passcode without restore? Keep reading to learn how!
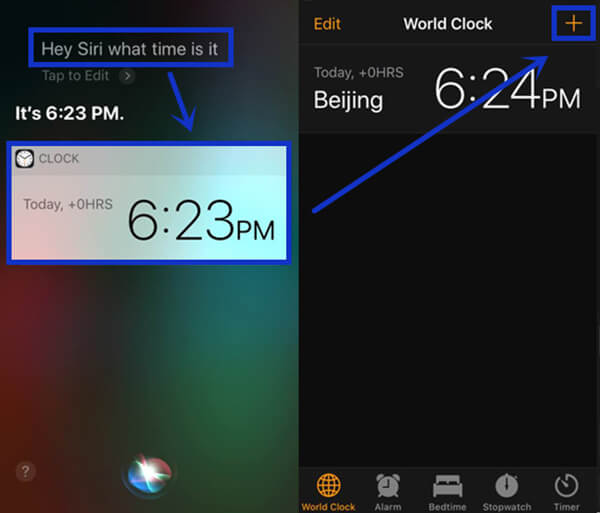
- 1 Hold and press the Home button, activate Siri and say, "Hey Siri what time is it?" Siri will then show you a clock.
- 2 Tap on the clock to open the clock interface, and then tap on the "+" icon on the top right corner.
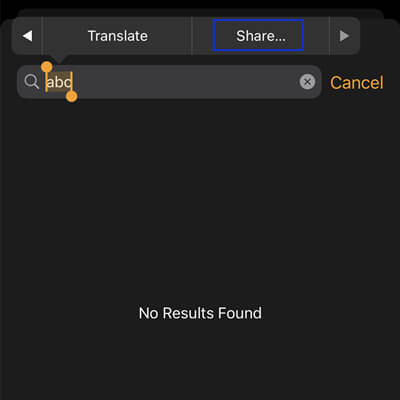
- 3 This will open a search bar for you to add any city. Simply type anything in that search bar and highlight it all.
- 4 Tap on the "Share" option from the list of new options.
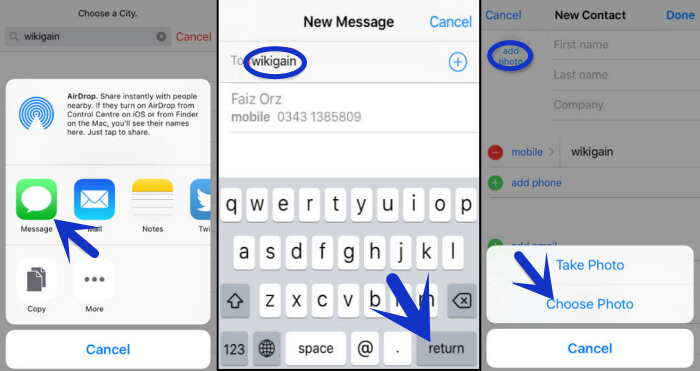
- 5Now you will get several options to share that highlighted text. Choose the Message option.
- 6 In the "To" section, randomly type anything and then tap on the "return" key. This will make the text in that "To" section get highlighted in green.
- 7 Now tap on the " + " icon on the right side of that text field and choose "Create New Contact" option.
- 8 Now select "add photo" as well. As soon as you go to the photo gallery, press the Home button immediately, and voila, you'll have bypassed your iPhone's passcode.
Limitations
- This method is only applicable to iPads running on iOS 8.0 to 10.1.
- This is only a temporary method and you'll need to repeat those steps every time you want to bypass the lock.
Part 3. How to Unlock iPad Passcode With Restore?
If you are looking for an official fix, the only way to unlock a locked iPad is by restoring its system via iTunes or iCloud. Let's go through these methods in this section.
1. Restore iPad via iTunes
Before restoring iPad using iTunes, Just keep in mind that this process will erase all your data and settings, including your iPad passcode. But you can restore everything from the backup, if there is any.
- If you have synced your iPad to iTunes before, then iTunes can directly recognize it.
- If you haven't or for any other reason your iPad just cannot get detected, you'll need to boot your iPad into recovery mode first to restore it.
If iPad Can Be Detected Directly:
- Step 1. Connect your iPad to your computer and Launch iTunes.
- Step 2. Locate your iPad when it gets recognized by iTunes. Click the Summary section.
- Step 3. Find and hit the Restore iPad button and confirm your choice.
- Step 4. Your iPad will be restored to factory settings. After that you can proceed to set it up as a new device with no lock passcode.

If iPad Cannot Be Detected Directly:
- Step 1. First, launch iTunes on your computer. Make sure you are using the latest iTunes version.
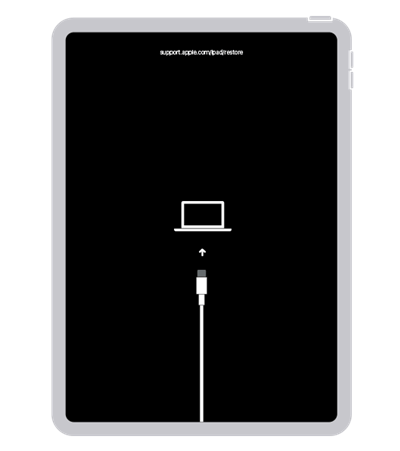
- Step 2. Now you need to put your iPad into recovery mode so that iTunes can detect it on your computer.
- For iPad with Home button, long-press the Top button until you see the power off slider, then turn off your iPad. As you concurrently connect your iPad to the computer, keep holding the Home button until the recovery mode screen appears on your iPad.
- For iPad with Face ID, long-press one of the Volume buttons and the Top button of your iPad to turn it off first. Then hold the Top button while connecting the iPad to the computer. Don't let go of the button until you see the iPad recovery mode screen.
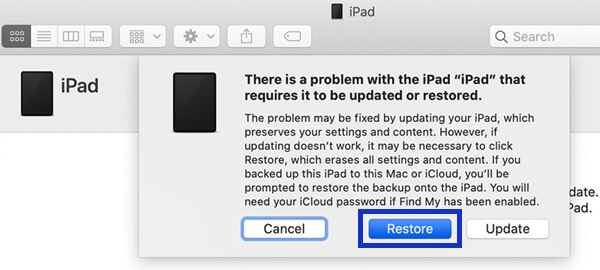
- Step 3. Select your iPad in iTunes when you have successfully entered the recovery mode. iTunes will display a window prompting you to restore or update your iPad. Click Restore and confirm your choice.
Limitations
- A working computer is needed with the latest version of iTunes installed.
- The steps involved are a bit complicated and the success is not guaranteed.
2. Erase iPad via iCloud
Another common way to restore iPad and unlock it is using iCloud - as long as you have previously enabled the Find My iPad feature on your iPad and you remember clearly the Apple ID and password. Through iCloud, you can even restore iPad remotely.
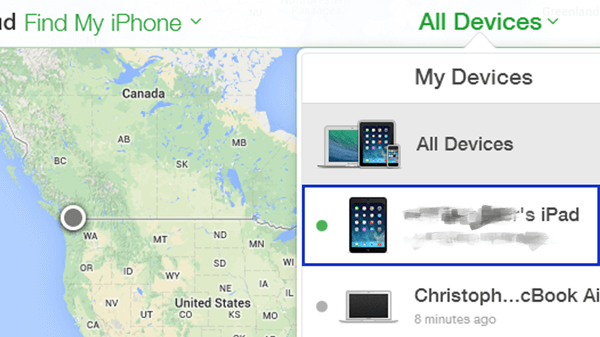
- Step 1. Using a working computer, visit iCloud.com and log in using the credentials associated with your locked iPad.
- Step 2. Once logged in, locate and hit the Find iPhone icon. In the All Devices list, scroll down and select your iPad.
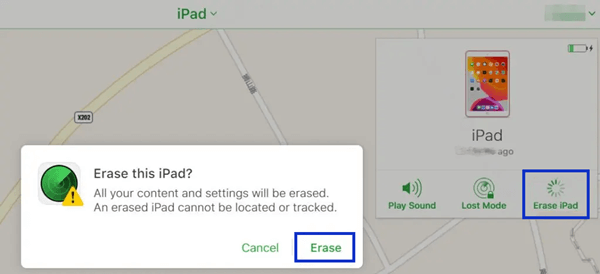
- Step 3. Hit the Erase iPad option from the options given and confirm your choice. Then your iPad will immediately reset.
Limitations
- You should remember the correct Apple ID and password to log in to iCloud.
- The Find My iPad feature should have been enabled.
- Your iPad needs to have steady internet connection.
Conclusion
Our data stored in iPad may be our most prized possession, and the fear of losing it can become a real headache if we find ourselves locked out of our iPads. Fortunately, the methods we have mentioned in this article above can come in real handy if you are wondering how to unlock iPad passcode with and without restore.
If you are seeking to unlock iPad passcode without restore as soon as possible, then the best option is LockEraser. Its ease of operation, security, affordability and high success rate has made it the top choice of thousands of iPad users. It's all set to never disappoint you.
Secure Download
