The screen passcode is one of the features that makes your iPhone safe and secure, preventing unauthorized access to your phone's data. But it can be a real pain when you've unfortunately forgotten your passcode, and you can't get into your device.
What if there exists a way to unlock your iPhone using the emergency call screen? Believe it or not, this is actually possible. This blog will tell you how to unlock iPhone with emergency call screen, along with some other effective methods to solve your problem if you have forgotten iPhone passcode. Keep reading for more information!
Part 1. How to Unlock iPhone With Emergency Call Screen?
Part 2. How to Unlock iPhone With Emergency Call Screen iOS 11/12/13/14/15?
Part 3. Other Methods to Unlock iPhone Running Any iOS Version
Part 1.How to Unlock iPhone With Emergency Call Screen?
Before trying to unlock iPhone with emergency call screen, you need to note some essential points to check if this method is suitable for you:
- This method only works for iOS version 6.1.
- After unlocking iPhone this way, you'll only get access to limited features like contacts, photos, and phone dialer. If you try to access other apps or features, you'll get stuck on the lock screen again.
- 1Slide to unlock your iPhone and type in a random passcode.
- 2Then tap on Cancel and bring up the passcode screen again.
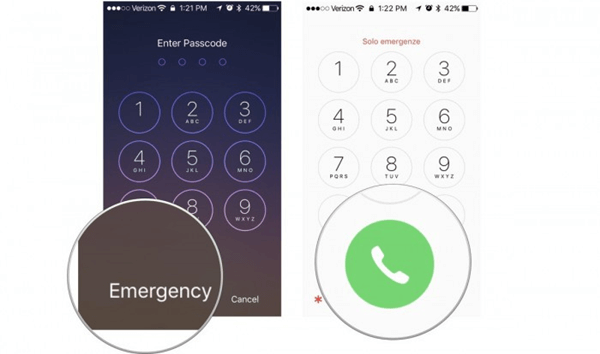
- 3Tap on Emergency and then hold down the power button until "slide to power off" option appears on your screen. Do not power it off and tap Cancel.
- 4Now dial any emergency number, for example, 911. Then tap on the emergency call button and cancel it immediately. Now press the power button and turn off the screen.
- 5Now press the power button again to turn on your screen, then slide to unlock your iPhone.
- 6Hold the power button for about 3 seconds and tap on Emergency before the "slide to power off" option appears. There you go, your iPhone has now been unlocked.
Part 2.How to Unlock iPhone With Emergency Call Screen iOS 11/12/13/14/15?
As we've mentioned above, it's possible to unlock iPhone with emergency call screen. But sadly, there's a catch here: the method does not work with the newer iOS versions.
Therefore, you will not be able to unlock iPhone with emergency call screen on iOS 11/12/13/14/15, as this method is only applicable to iOS 6.1 or older versions. But don't worry, we've got some other methods to unlock iPhone running newer iOS versions.
Part 3.Other Methods to Unlock iPhone Running Any iOS Version
1. Use UnicTool LockEraser
One of the best ways to get your disabled iPhone unlocked is to use a third-party tool. Currently, there are so many self-proclaimed unlocking applications out there that you won't even know which one works and which one doesn't.
If you don't know how to make a wise decision, take it easy as we are here for you. A trusted tool like our UnicTool LockEraser can always be your go-to option to help unlock iPhone without any difficulty or limitations.
- Unlock your iPhone running iOS 11/12/13/14/15effectively.
- Unlock iPhone under any circumstances without passcode.
- An all-in-one iDevice passcode unlocker: unlock Apple ID/Screen Time passcode and bypass MDM.
- Easy to navigate; require no technical experience or knowledge.
- Work seamlessly for all iOS versions and models.
- Free trial is available before purchase.
Secure Download
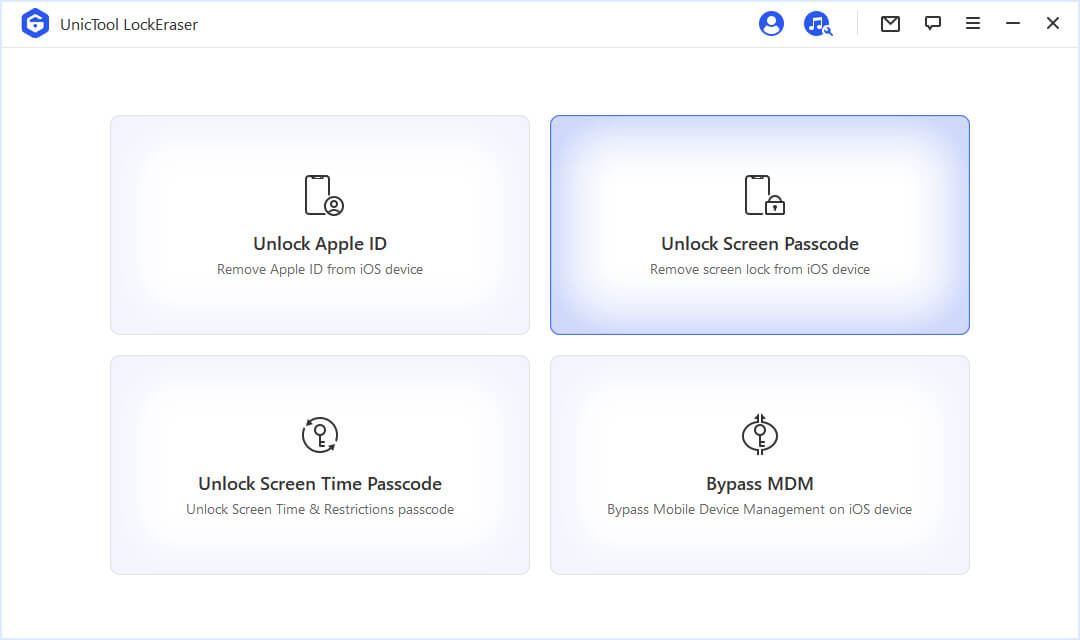
- 1Download, install and launch LockEraser on your computer. Select "Unlock Screen Passcode" mode.
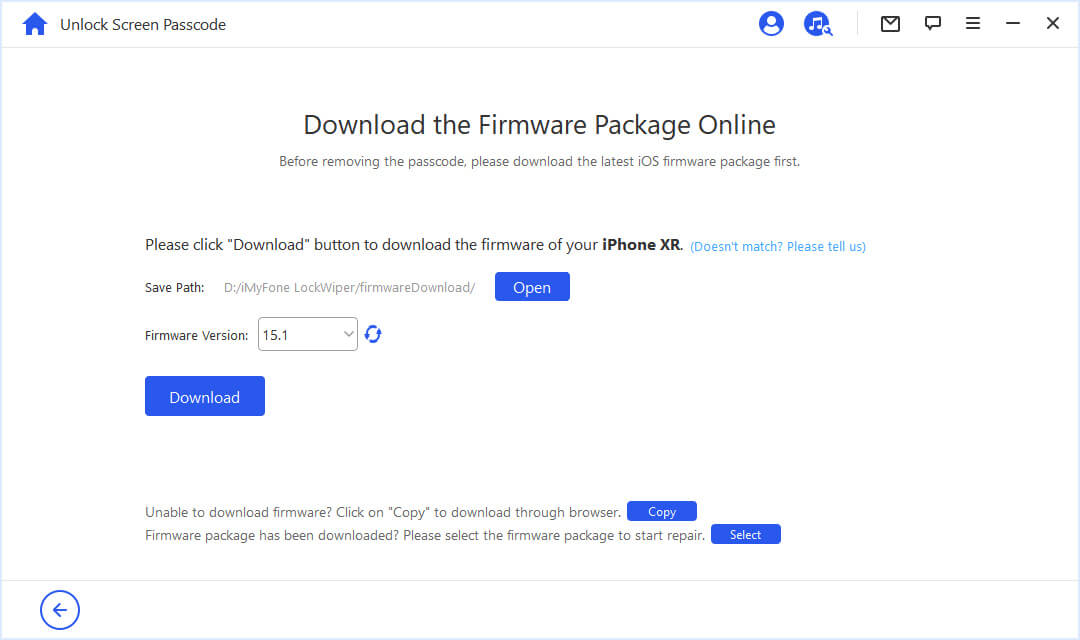
- 2Choose the firmware version provided based on your device model and click "Download". Then wait a few minutes for LockEraser to download and verify the firmware package.
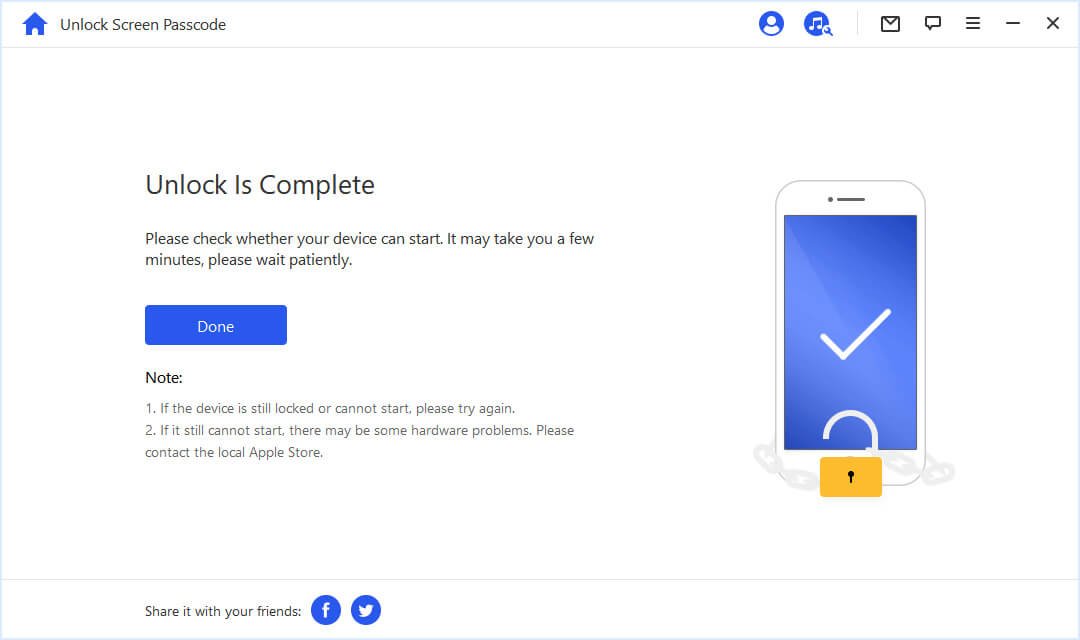
- 3When the extraction is completed, click the "Unlock" button. When the unlocking work is done, you will see the notification on the screen.
2. Use iTunes
You can also unlock your iPhone with a computer using iTunes. However, here are some points that you should keep in mind while opting for this method.
- You'll need to boot your iPhone into recovery mode first to restore it.
- This method may be a little time-comsuming and the success is not guaranteed.
- 1 Open iTunes on your computer, then connect your disabled device to the computer via a suitable cable.
- 2 Boot your disabled iPhone into recovery mode as follows.
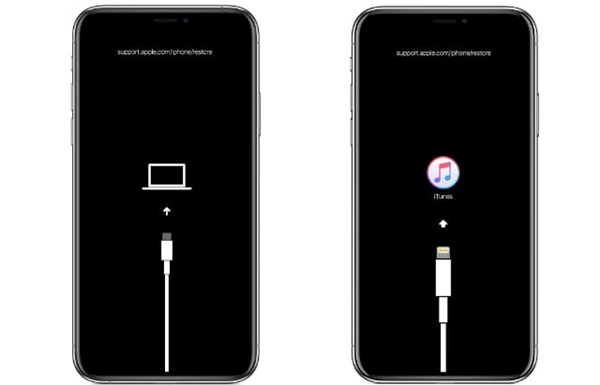
For iPhone 8 or Later
- Successively press and release the Volume Up then Volume Down buttons.
- Long-press the Side button until the recovery mode screen appears.
For iPhone 7/7 Plus
- Simultaneously long-press the Side/Top and Volume Down buttons until iPhone enters the recovery mode.
For iPhone 6S or Earlier
- Long-press both the Home and Side/Top buttons until the recovery mode appears on the screen.
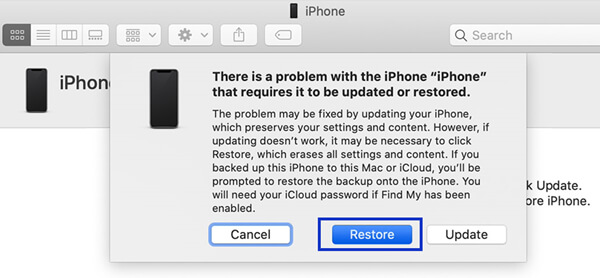
- 3Locate your device and choose Restore when given the Restore and Update options.
- 4 Your computer will download software for your iPhone and begin the restore process. When it is completed, set up your iPhone and use it.
3. Use iCloud
Forgetting your iPhone's passcode and the fear of getting locked out is a nightmare. Thankfully, you can also simply log in to your iCloud web to erase and unlock your iPhone.
- You need the correct Apple ID and password.
- The Find My iPhone feature should have been enabled on your locked iPhone.
- Your locked iPhone needs steady internet connection.
- 1Go to iCloud from your computer and use your Apple ID credentials to sign in.
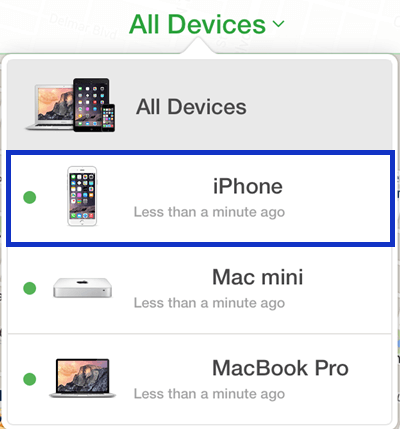
- 2Now go to Find iPhone and locate your iPhone under the All Devices title.
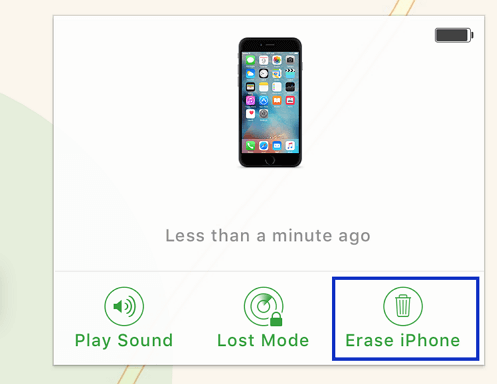
- 3Click on your iPhone and select the Erase iPhone option. This will reset all the settings of it and bypass iPhone passcode.
Bonus:How to Unlock iPhone Using Siri?
Do you know that you can unlock iPhone using Siri? Yes, Siri can not only help you out with your routine functions but also with getting into your disabled iPhone without a passcode. But you need to note that the Siri glitch is only compatible with iPhone running on iOS 8.0 to 10.1.
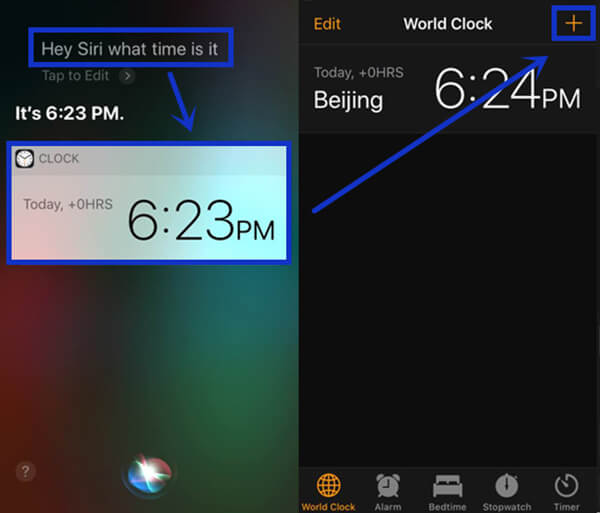
- 1 Hold and press the Home button, activate Siri and say, "Hey Siri what time is it?" Siri will then show you a clock.
- 2 Tap on the clock to open the clock interface, and then tap on the "+" icon on the top right corner.
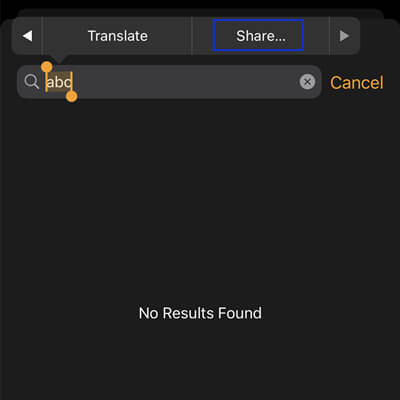
- 3 This will open a search bar for you to add any city. Simply type anything in that search bar and highlight it all.
- 4 Tap on the "Share" option from the list of new options.
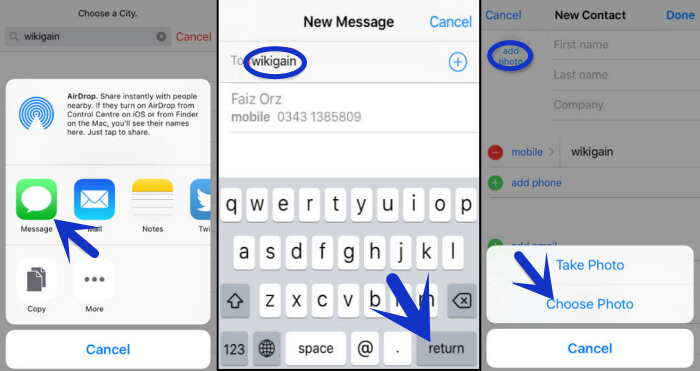
- 5 Now you will get several options to share that highlighted text. Choose the Message option.
- 6 In the "To" section, randomly type anything and then tap on the "return" key.This will make the text in that "To"section get highlighted in green.
- 7 Now tap on the " + " icon on the right side of that text field and choose "Create New Contact" option.
- 8 Now select "add photo" as well. As soon as you go to the photo gallery, press the Home button immediately, and voila, you'll have bypassed your iPhone's passcode.
Conclusion
We all know the feeling of getting locked out of your iPhone. It's frustrating, and it seems like the process of solving the problem is going to forever! Well, in this blog, we've covered the steps on how to unlock iPhone with emergency call screen.
As the method only applies to iOS 6.1, we've offered many other alternatives to unlock iPhone running any iOS version. Among the tools mentioned, the best one is LockEraser. It's safe, professional and highly affordable. So what are you waiting for? Download it now and unlock your iPhone efficiently right away!
Secure Download

