Many people have faced issues with the problem of iPhone do not disturb not working in the new iOS versions. There could be various reasons behind it. If you are also facing the same issue, you have landed in the right place.
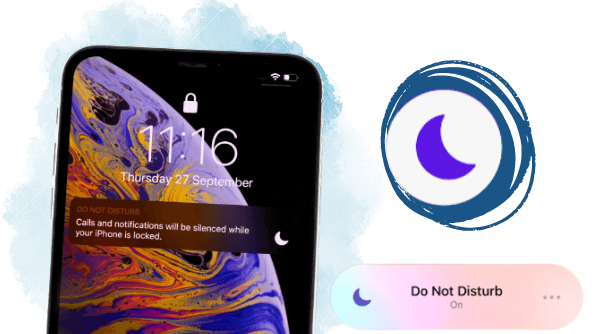
In this article, we will share a few methods that can help you fix 'do not disturb is not working on iPhone' issue. You can try all these methods. We will also share a third-party iOS tool that fixes various iPhone and iPadOS issues. Read this article and get rid of the problem on your own.
Part 1. How To Put iPhone On Do Not Disturb
Part 2. How To Fix Do Not Disturb Is Not Working On iPhone
- Way 1. Make Sure Do Not Disturb Is Turned On
- Way 2. Disable or Adjust Do Not Disturb Schedule
- Way 3. Reset All Settings On Device
- Way 4. Change Your Contact Status
- Way 5. Factory Reset Your iPhone
- Way 6. Update iOS version
Part 3. Fix iPhone Do Not Disturb Not Working Without Data Loss
 Secure Download
 Secure Download
Part 1. How Does Do Not Disturb Work On iPhone
In the recent iOS versions, you do not see the do not disturb mode when you swipe down on the home screen. New users might get frustrated after shifting from an old iOS version to a new one and may confused of where is do not disturb on iphone.
Apple has improved the do not disturb mode in iOS 16, and now, there are more features and options available. You will see a new option, “Focus,” which is the advanced or expanded version of Do Not Disturb.
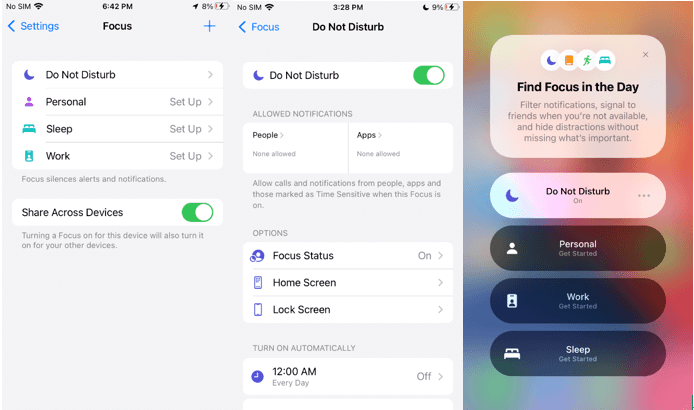
There are two simple ways to turn on do not disturb mode on iPhone.
- 1 Turn On Do Not Disturb Mode From Setting
- 2 Go to Do Not Disturb mode from the home screen
Open Settings > Tap on Focus. You will see the Do Not Disturb mode at the top. If you tap on it, you will see more options and settings.
On the Home screen, swipe up > Tap on Focus > Tap on 'Do Not Disturb button' to turn it on. Tap on the three-dots icon. Here, you can set the schedule or time for the mode.
Part 2. How To Fix Do Not Disturb Is Not Working On iPhone
We are going to share a few methods that can help you fix the iPhone do not disturb not working issue. The Do Not Disturb mode might start working after following these tips and tricks.
Way 1. Make Sure Do Not Disturb Is Turned On
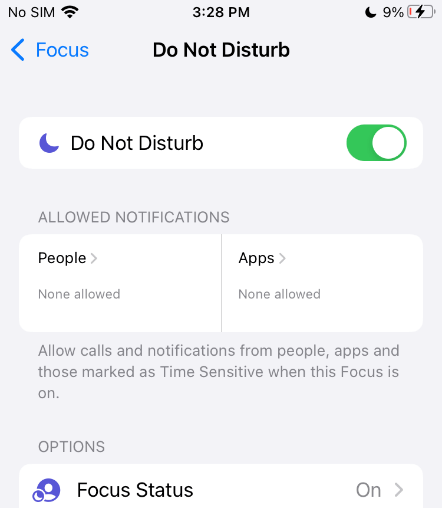
The Do Not Disturb mode can be scheduled, so if you have set a time for that, it will turn off automatically. Thus, you need to make sure that the Do Not Disturb mode is turned on. For that, you just need to swipe up on the home screen. Tap on Focus, You will see here whether the mode is turned on or off.
Way 2. Disable or Adjust Do Not Disturb Schedule
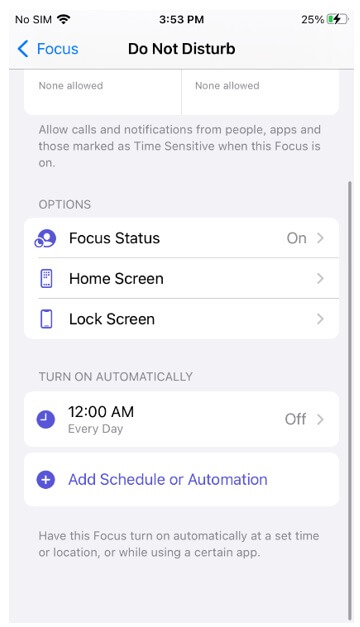
You can also try enabling and disabling the Do Not Disturb mode. It might solve the issue of do not disturb is not working on iPhone. Sometimes, the schedule of the Do Not Disturb mode creates problems. You can adjust the schedule from Settings.
Go to Settings>Focus>Do Not Disturb At the bottom, you will see the schedule. Sometimes, a schedule automatically turns off or on mode. So, if there is any schedule set, you can turn it off. You can also add a new schedule.
Way 3. Reset All Settings On The Device
The settings on the device can be reset, and it can also solve various issues with your iPhone.
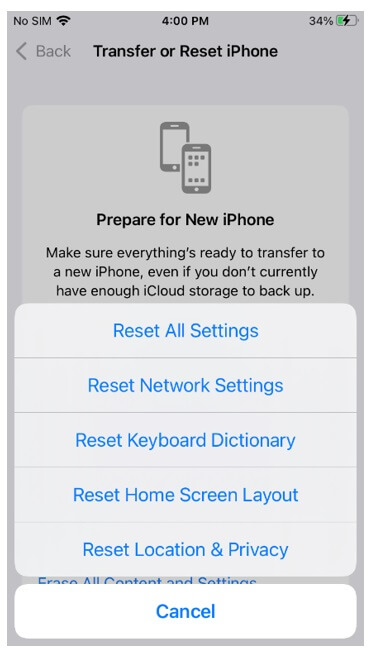
Go to Settings >Tap on General > Transfer or Reset iPhone > Tap on Reset > Tap on Reset All Settings. And then you just need to wait for a few minutes, and after that, you can check whether the mode is working fine or not.
Way 4. Change Your Contact Status
Sometimes, there are some contacts added to the Favorite list. Thus, even if you have enabled the Do Not Disturb mode, you receive calls from those contacts. Therefore, you can add or remove the contacts to get the most out of the feature.
Go to the Phone app > Tap on Favorite > Tap on the Edit button and add and remove contacts from the list.

Way 5. Factory Reset Your iPhone
The factory reset brings your device to the factory settings, and then it behaves just like a new device. But keep in mind that it will erase your data, so before doing this, you must create a backup.
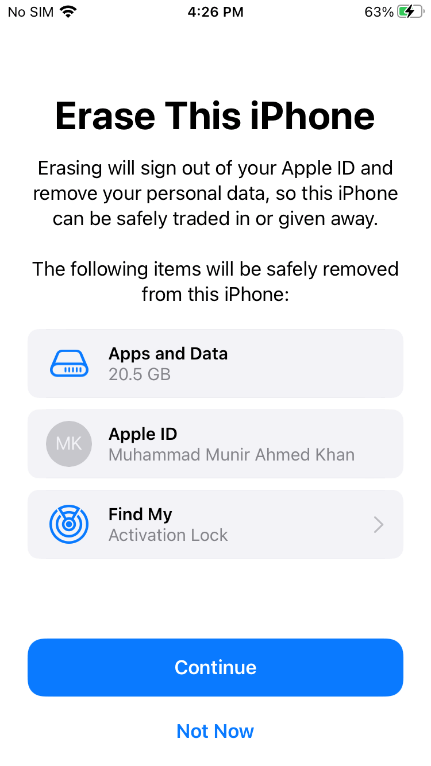
Go to Settings>General>Transfer or Reset>Erase All Content and Settings Tap on Continue and follow along to reset the device.
Way 6. Update iOS Version
The iOS version can also be the cause of the issue. So, you can also try upgrading to the iOS version.
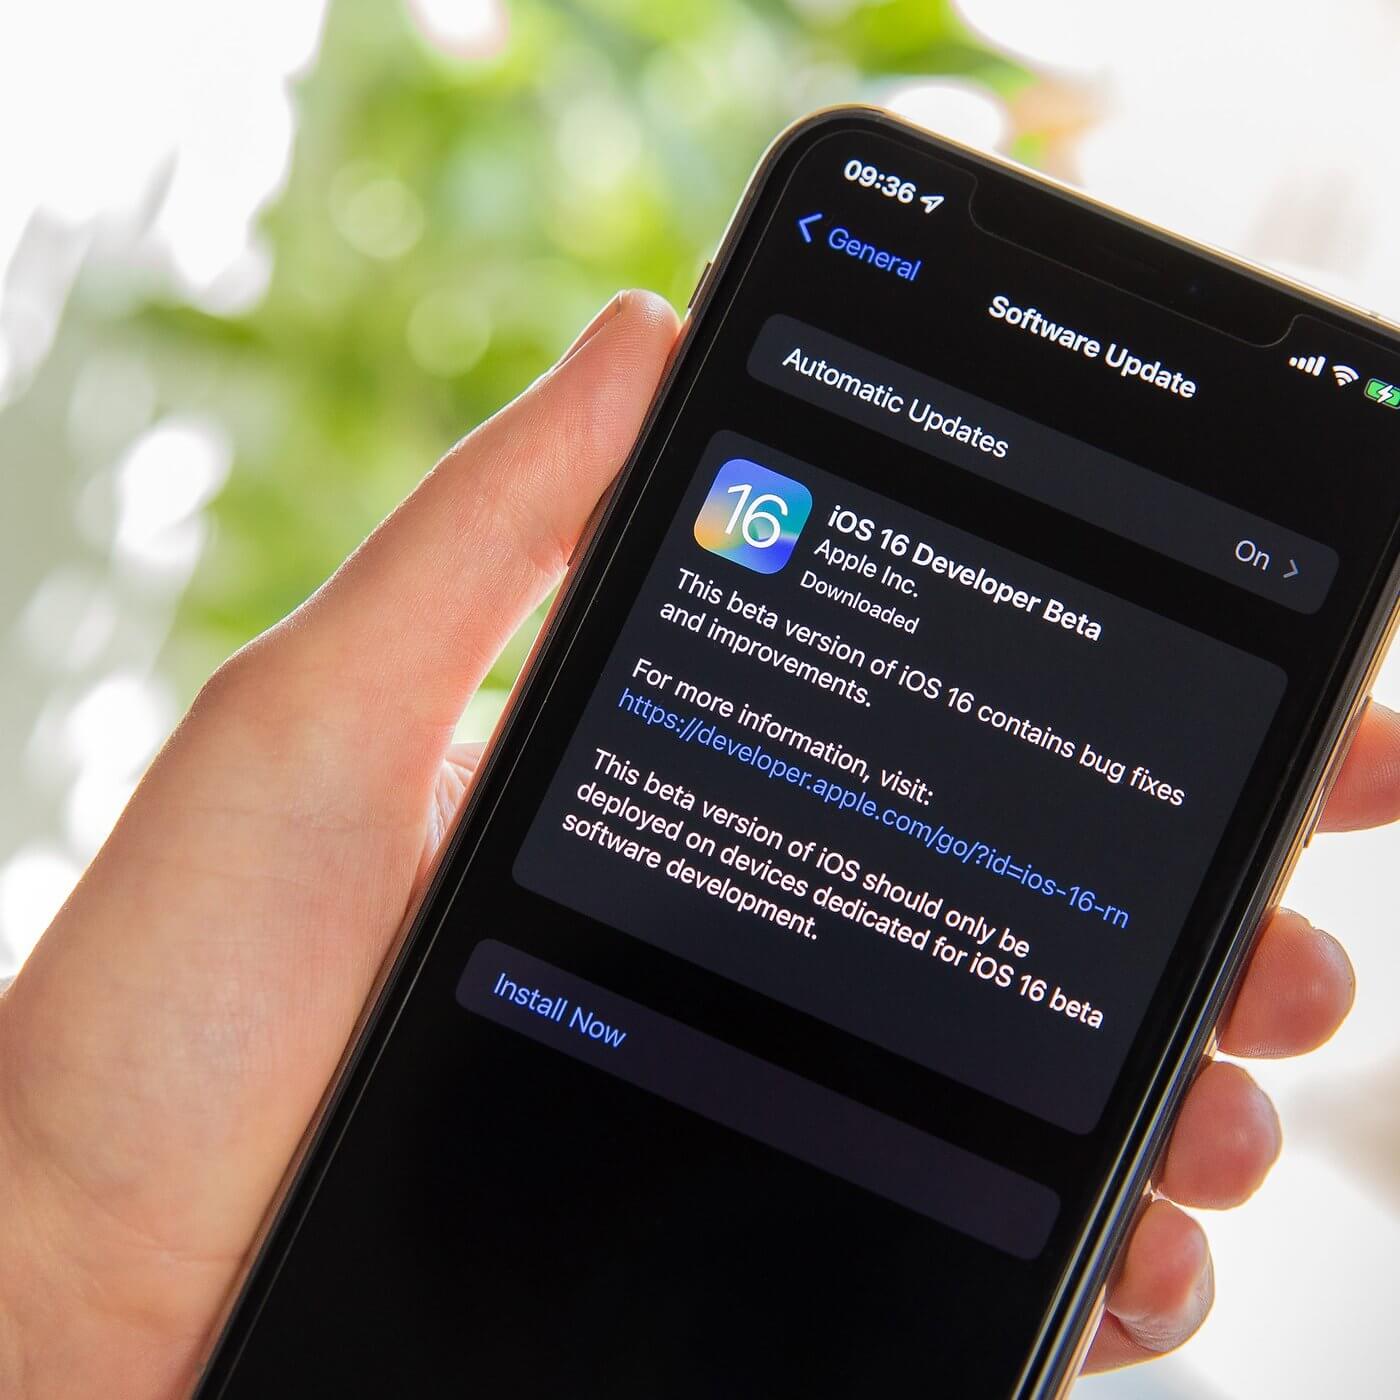
Go to Settings>General>Software Update. If there is any update available, download and install it on your device. It will hopefully solve the issue.
If these methods do not work in your case, don’t worry; we will share a reliable solution in Part 3.
Part 3. Fix iPhone Do Not Disturb Not Working Without Data Loss
If you have tried everything and nothing worked for you, it is time to try a powerful tool that can fix iOS issues. Plus, if you want to save time and get rid of the problem without any hassle, you must use it in the first place.
UnicTool Umendit is a splendid tool that can fix iOS, iPadOS, and tvOS issues in no time. It is specifically developed to fix system issues and repair your devices, and it quickly fixes iPhone Do Not Disturb not working issues in a few simple steps.
You can use the tool without any prior experience or expertise. It is beginner-friendly and a perfect tool for those who want to solve various issues with iPhones and iPads.
- UnicTool Umendit solves many issues related to iPhones, including the Stuck Apple Logo, boot loop, black screen of death, and many more.
- The software can easily bypass all iTunes errors.
- You can reset your iOS without the need for a password
- You can exit or enter recovery mode with one click.
- Downgrades iOS without jailbreak.
- No data is lost in the Standard mode.
- The advanced mode helps you solve major issues, but it also erases your data.
 Secure Download
 Secure Download
Steps to Use UnicTool Umendit
Step 1: Install Umendit On Your PC(Windows or Mac)
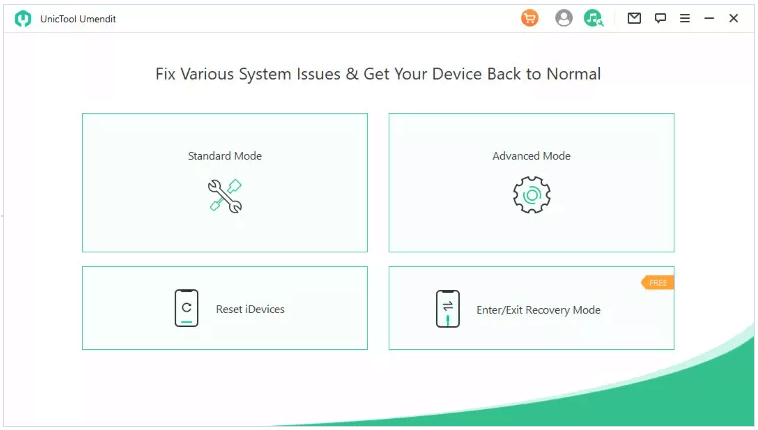
Download and Launch the tool. On the main interface, you will see various options. You need to click on Standard Mode.
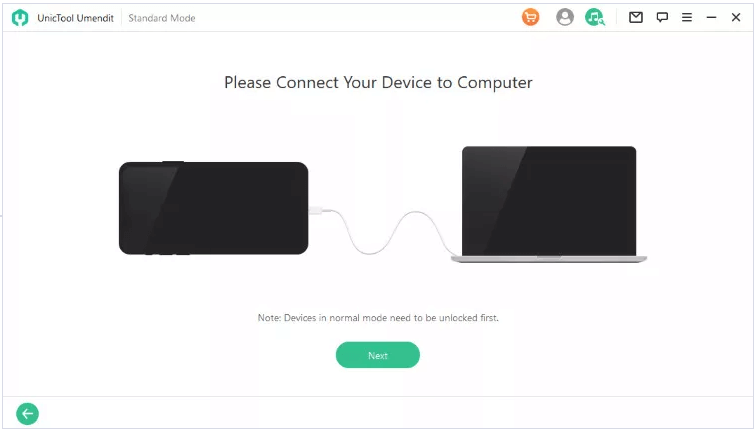
Step 2: Connect Phone With Laptop
Now connect your iPhone to your computer using a USB cable. Click on Next.
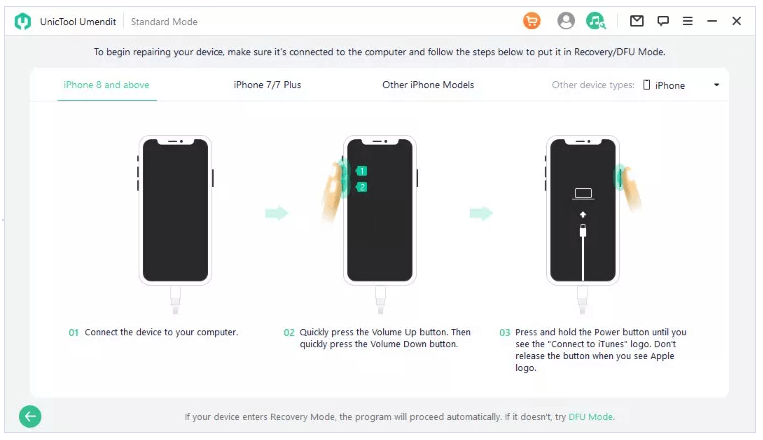
Step 3: Enter In The Recovery Mode
If your device is not detected at this stage, you will need to put it on Recovery or DFU mode. You will see the step-by-step instructions on the screen.
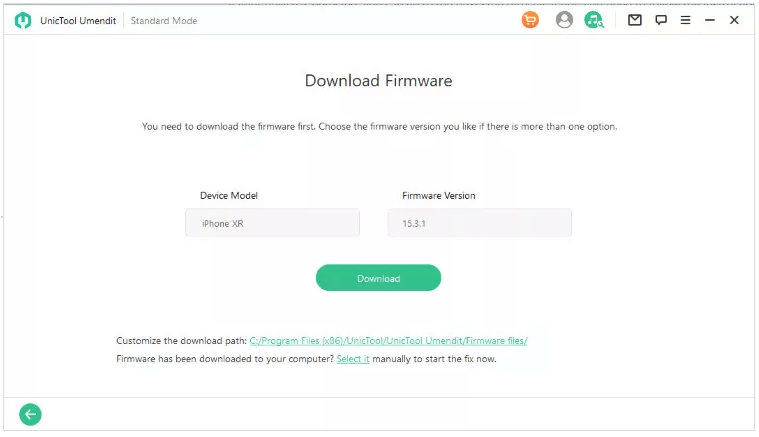
Step 4: Download Firmware
The software will show you the option to download the firmware. It will automatically select the right firmware for your device. Click on Next.
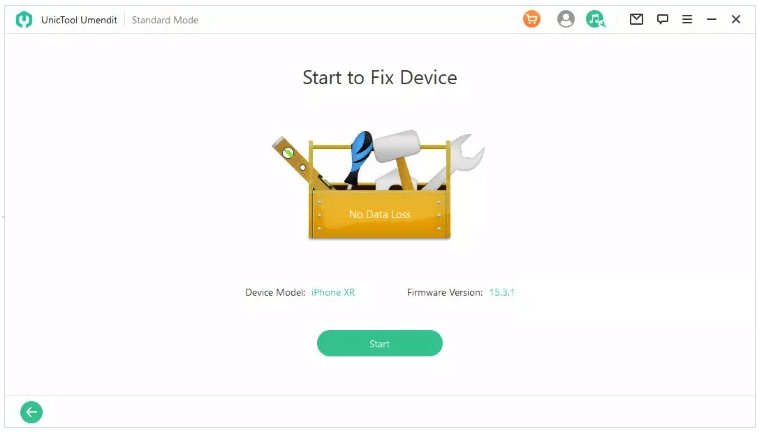
Step 5: Repair The Problem
Click on the Start button. The software will start fixing your device. It will take some time, and after a few minutes, you will see the successful message on the screen.
Conclusion
We have seen various solutions to make the Do Not Disturb mode work. You can try all those solutions. If those solutions do not work or you want to get rid of the problem quickly, you can try UnicTool Umendit. It is a perfect tool that is specifically created to solve iOS and iPadOS issues. You only need to follow a few simple steps to solve the problem, and the best part is that your data remains intact.

Fix ‘Do Not Disturb Not working’ Issue
- Just one click to enter or leave recovery mode.
- Erase and reinstall all the data without iCloud password
- Fix 150+ iOS issues without data loss
- Downgrade iOS without jailbreak
- Supports the latest iOS version, iOS 16.
73,128 downloads
100% secure
